
Updated 22nd August 2024
My mum used to make raspberry buns a lot when I was younger, as they were one of my brother’s favourite things to have for his supper. I love to make things that evoke happy memories.
I’ve had a go at rustling up gluten free raspberry buns a few times now, and have been delighted with how well they’ve turned out. And of course, any gluten free recipe success story MUST be shared with you!
These gluten free raspberry buns are super simple to pop together. The basic recipe is pretty much the same as the one you’d use to make scones, minus the baking powder and with a touch more milk added to give you a stickier dough.
I like to give the raspberry buns a little brush of milk and a generous sprinkle of caster sugar before baking. As it gives the buns a lovely crisp sugary crunch before you bite through into the light soft centre and hit the jackpot… raspberry jam!
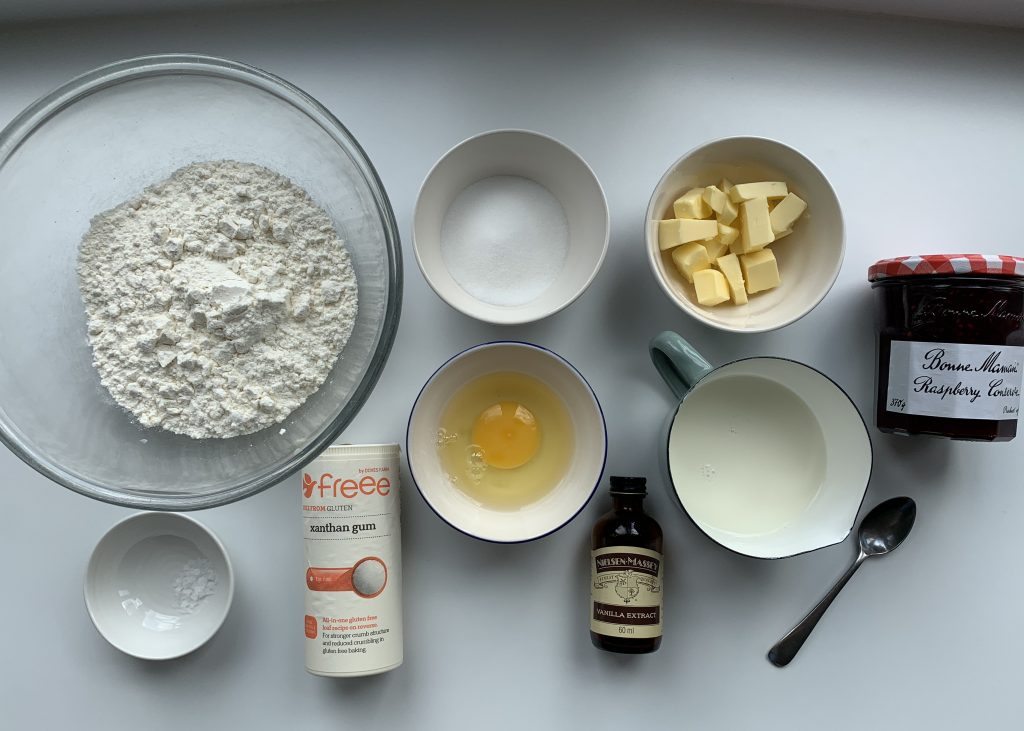
Ingredients (makes 12)
225g (8oz) gluten free self-raising flour (plus a little extra to flour your hands)
50g (2oz) chilled butter, cubed
50g (2oz) caster sugar (plus a little extra to sprinkle over the buns)
½ teaspoon xanthan gum
Good pinch of salt (only required if using unsalted butter)
1 large beaten egg
1 teaspoon vanilla extract
4 – 5 tablespoons milk (you may not need it all or you may need a touch more – you will need a little extra milk to brush over the buns too)
Raspberry jam
Method
Preheat the oven to 190C/375F/Gas 5/170C Fan.
Lay a piece of greaseproof onto a large flat baking tray (10 x 14 inch approx) no need to grease. If you don’t have any greaseproof then just very lightly grease the tray.
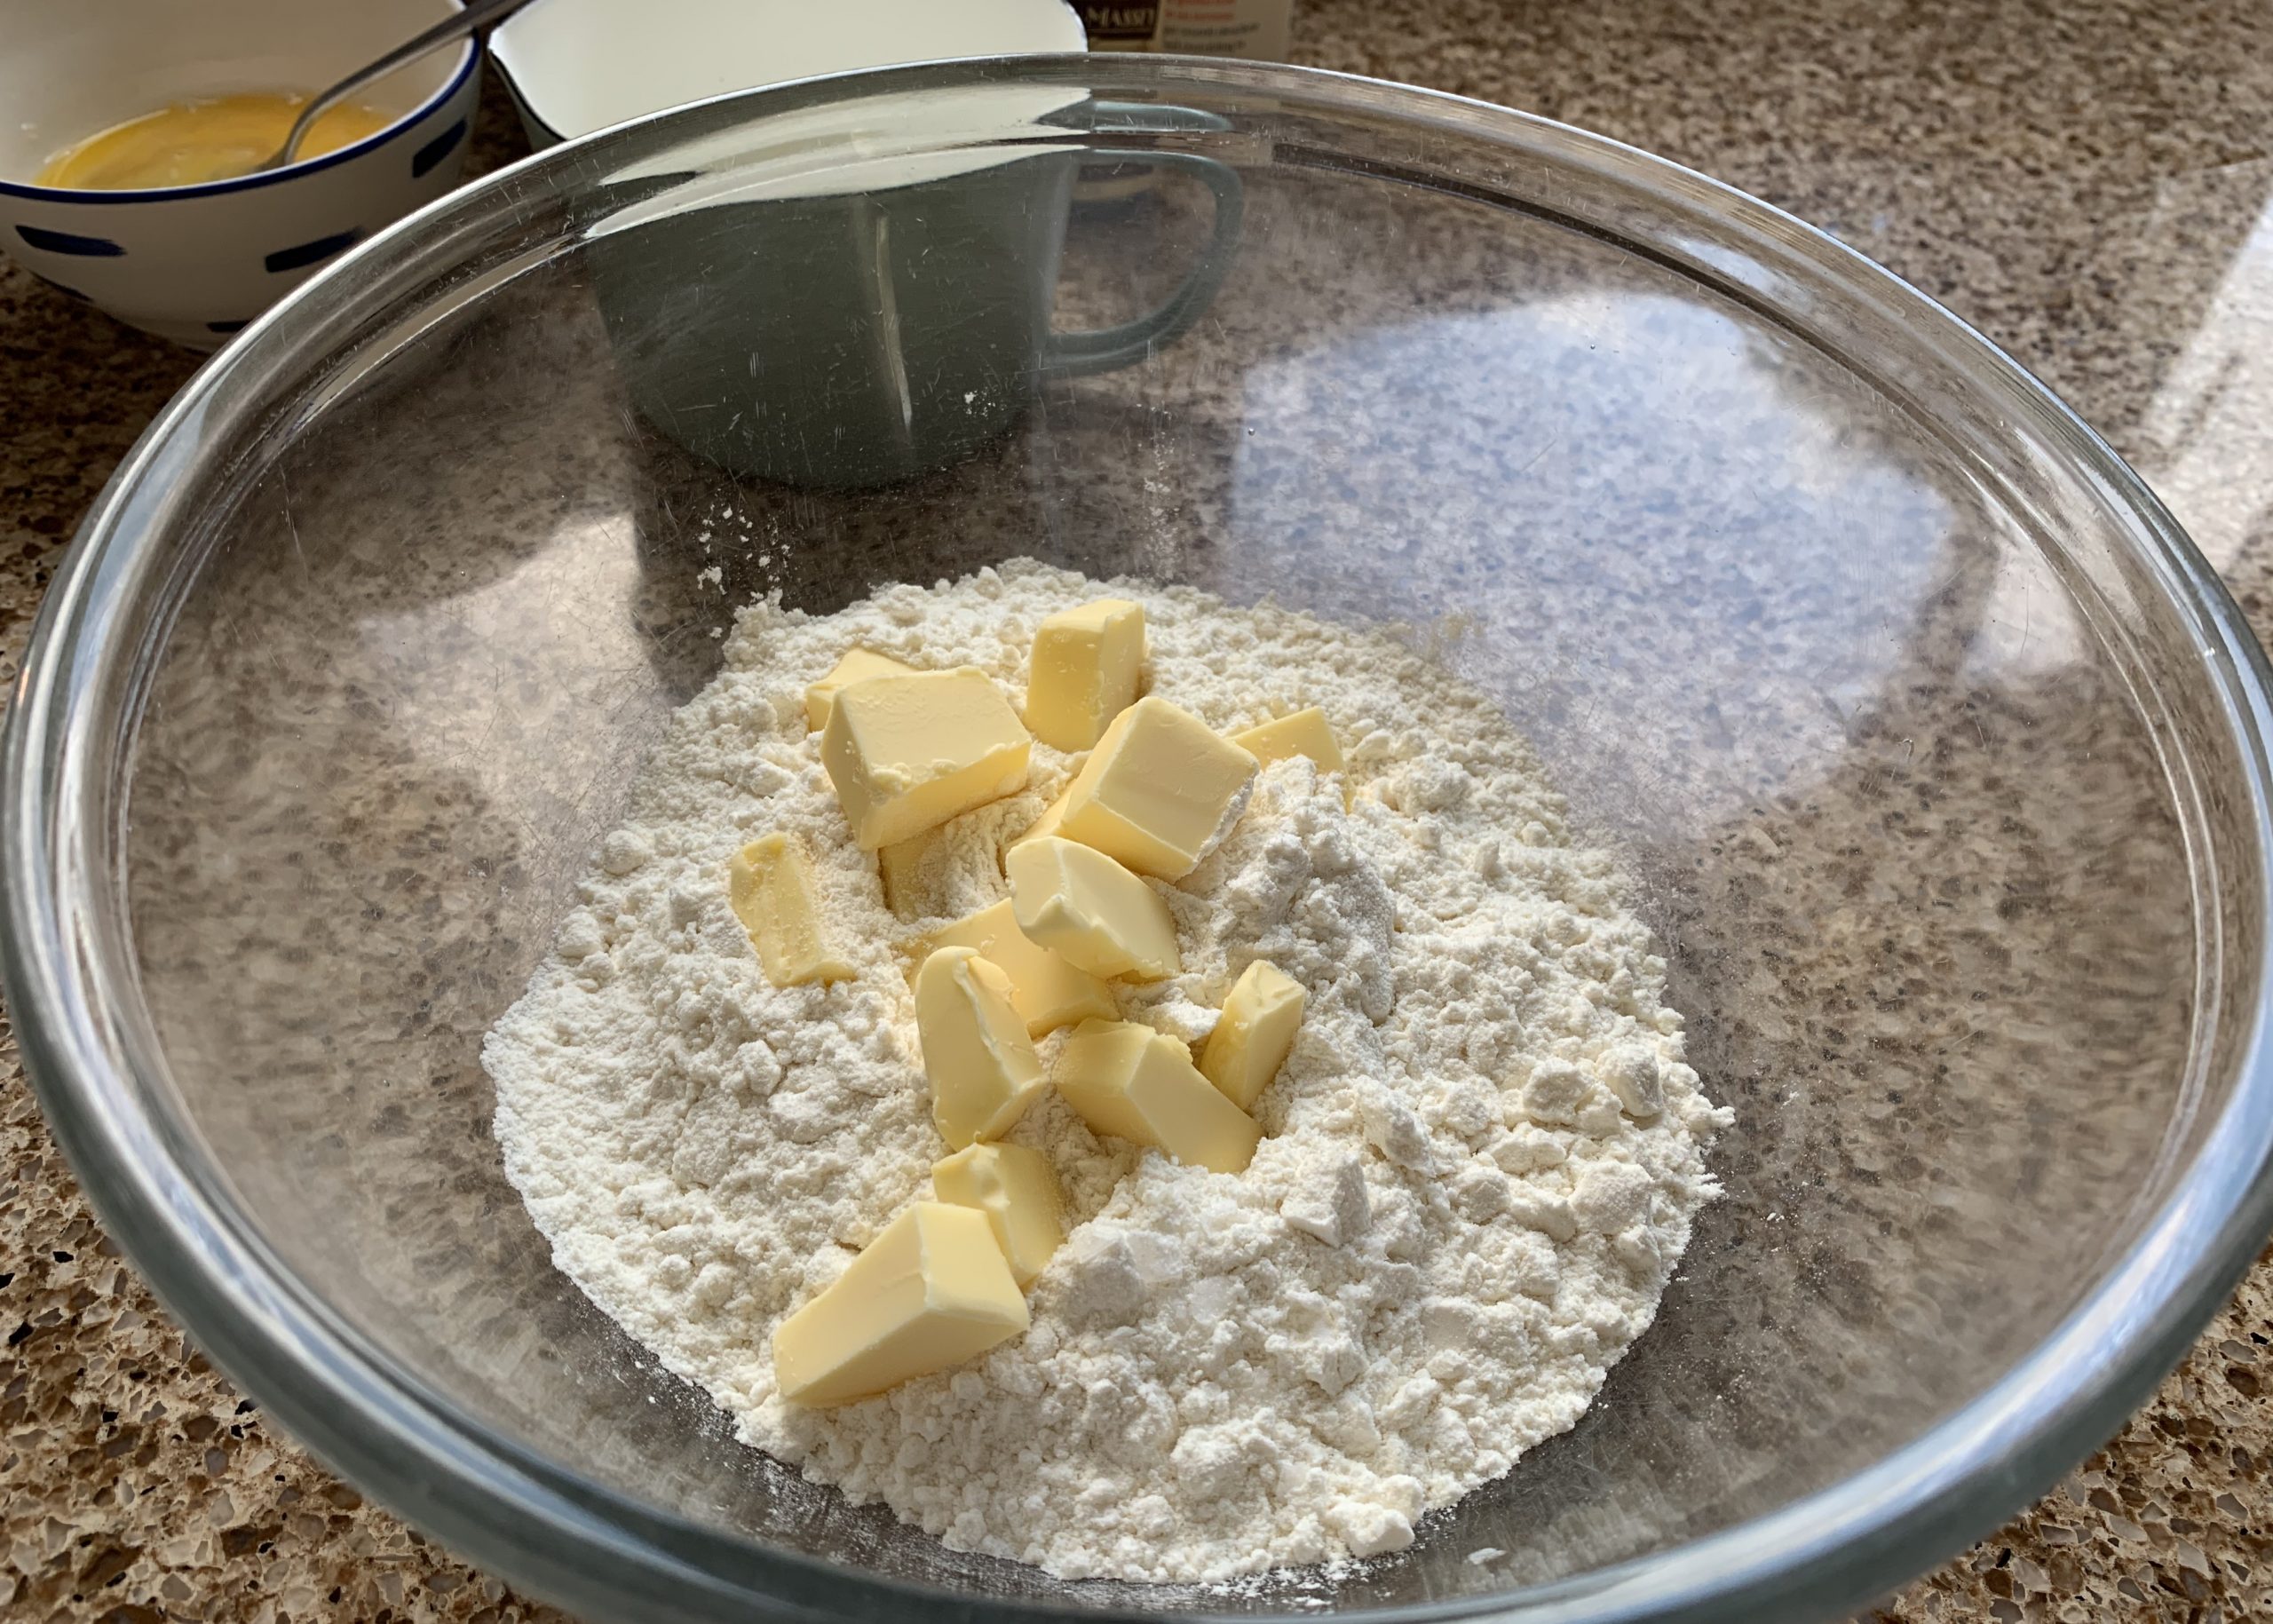
Add the gluten free flour, xanthan gum and salt (if using unsalted butter) to a large mixing bowl and give it a stir with a fork or blend with your fingers.
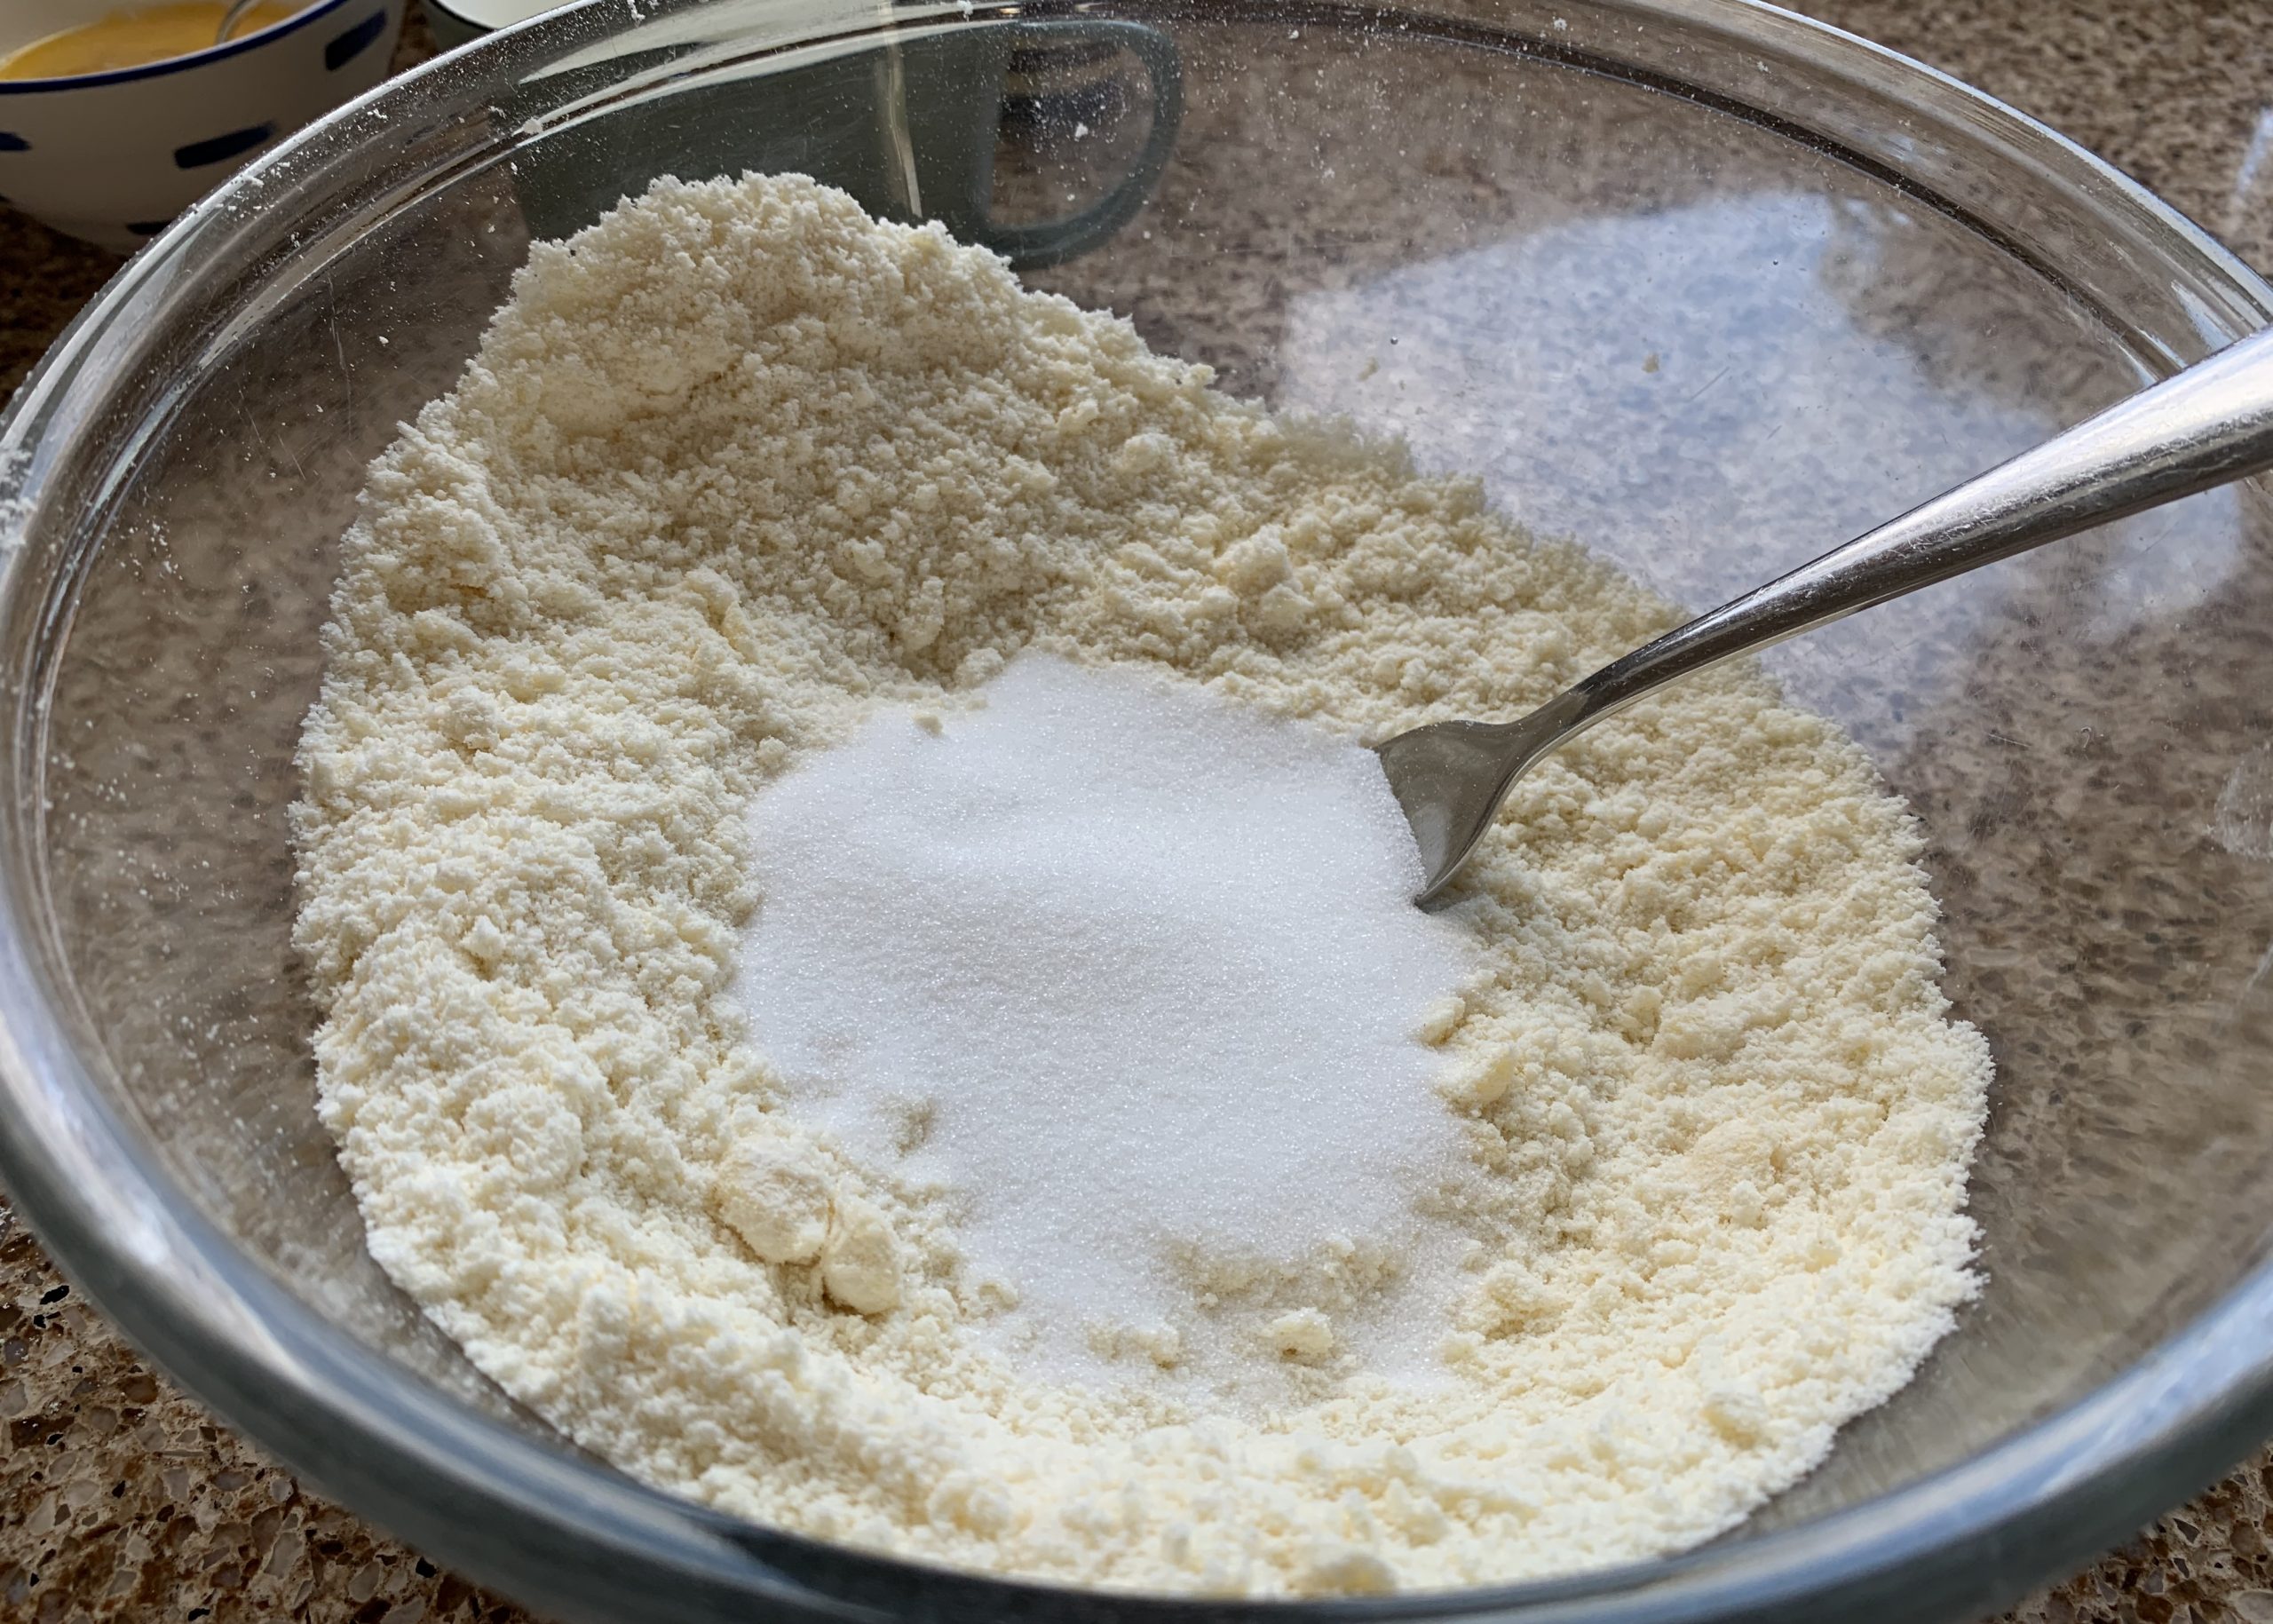
Next add the cubed butter and rub it into the flour until it resembles fine breadcrumbs.
Add the caster sugar and combine well.
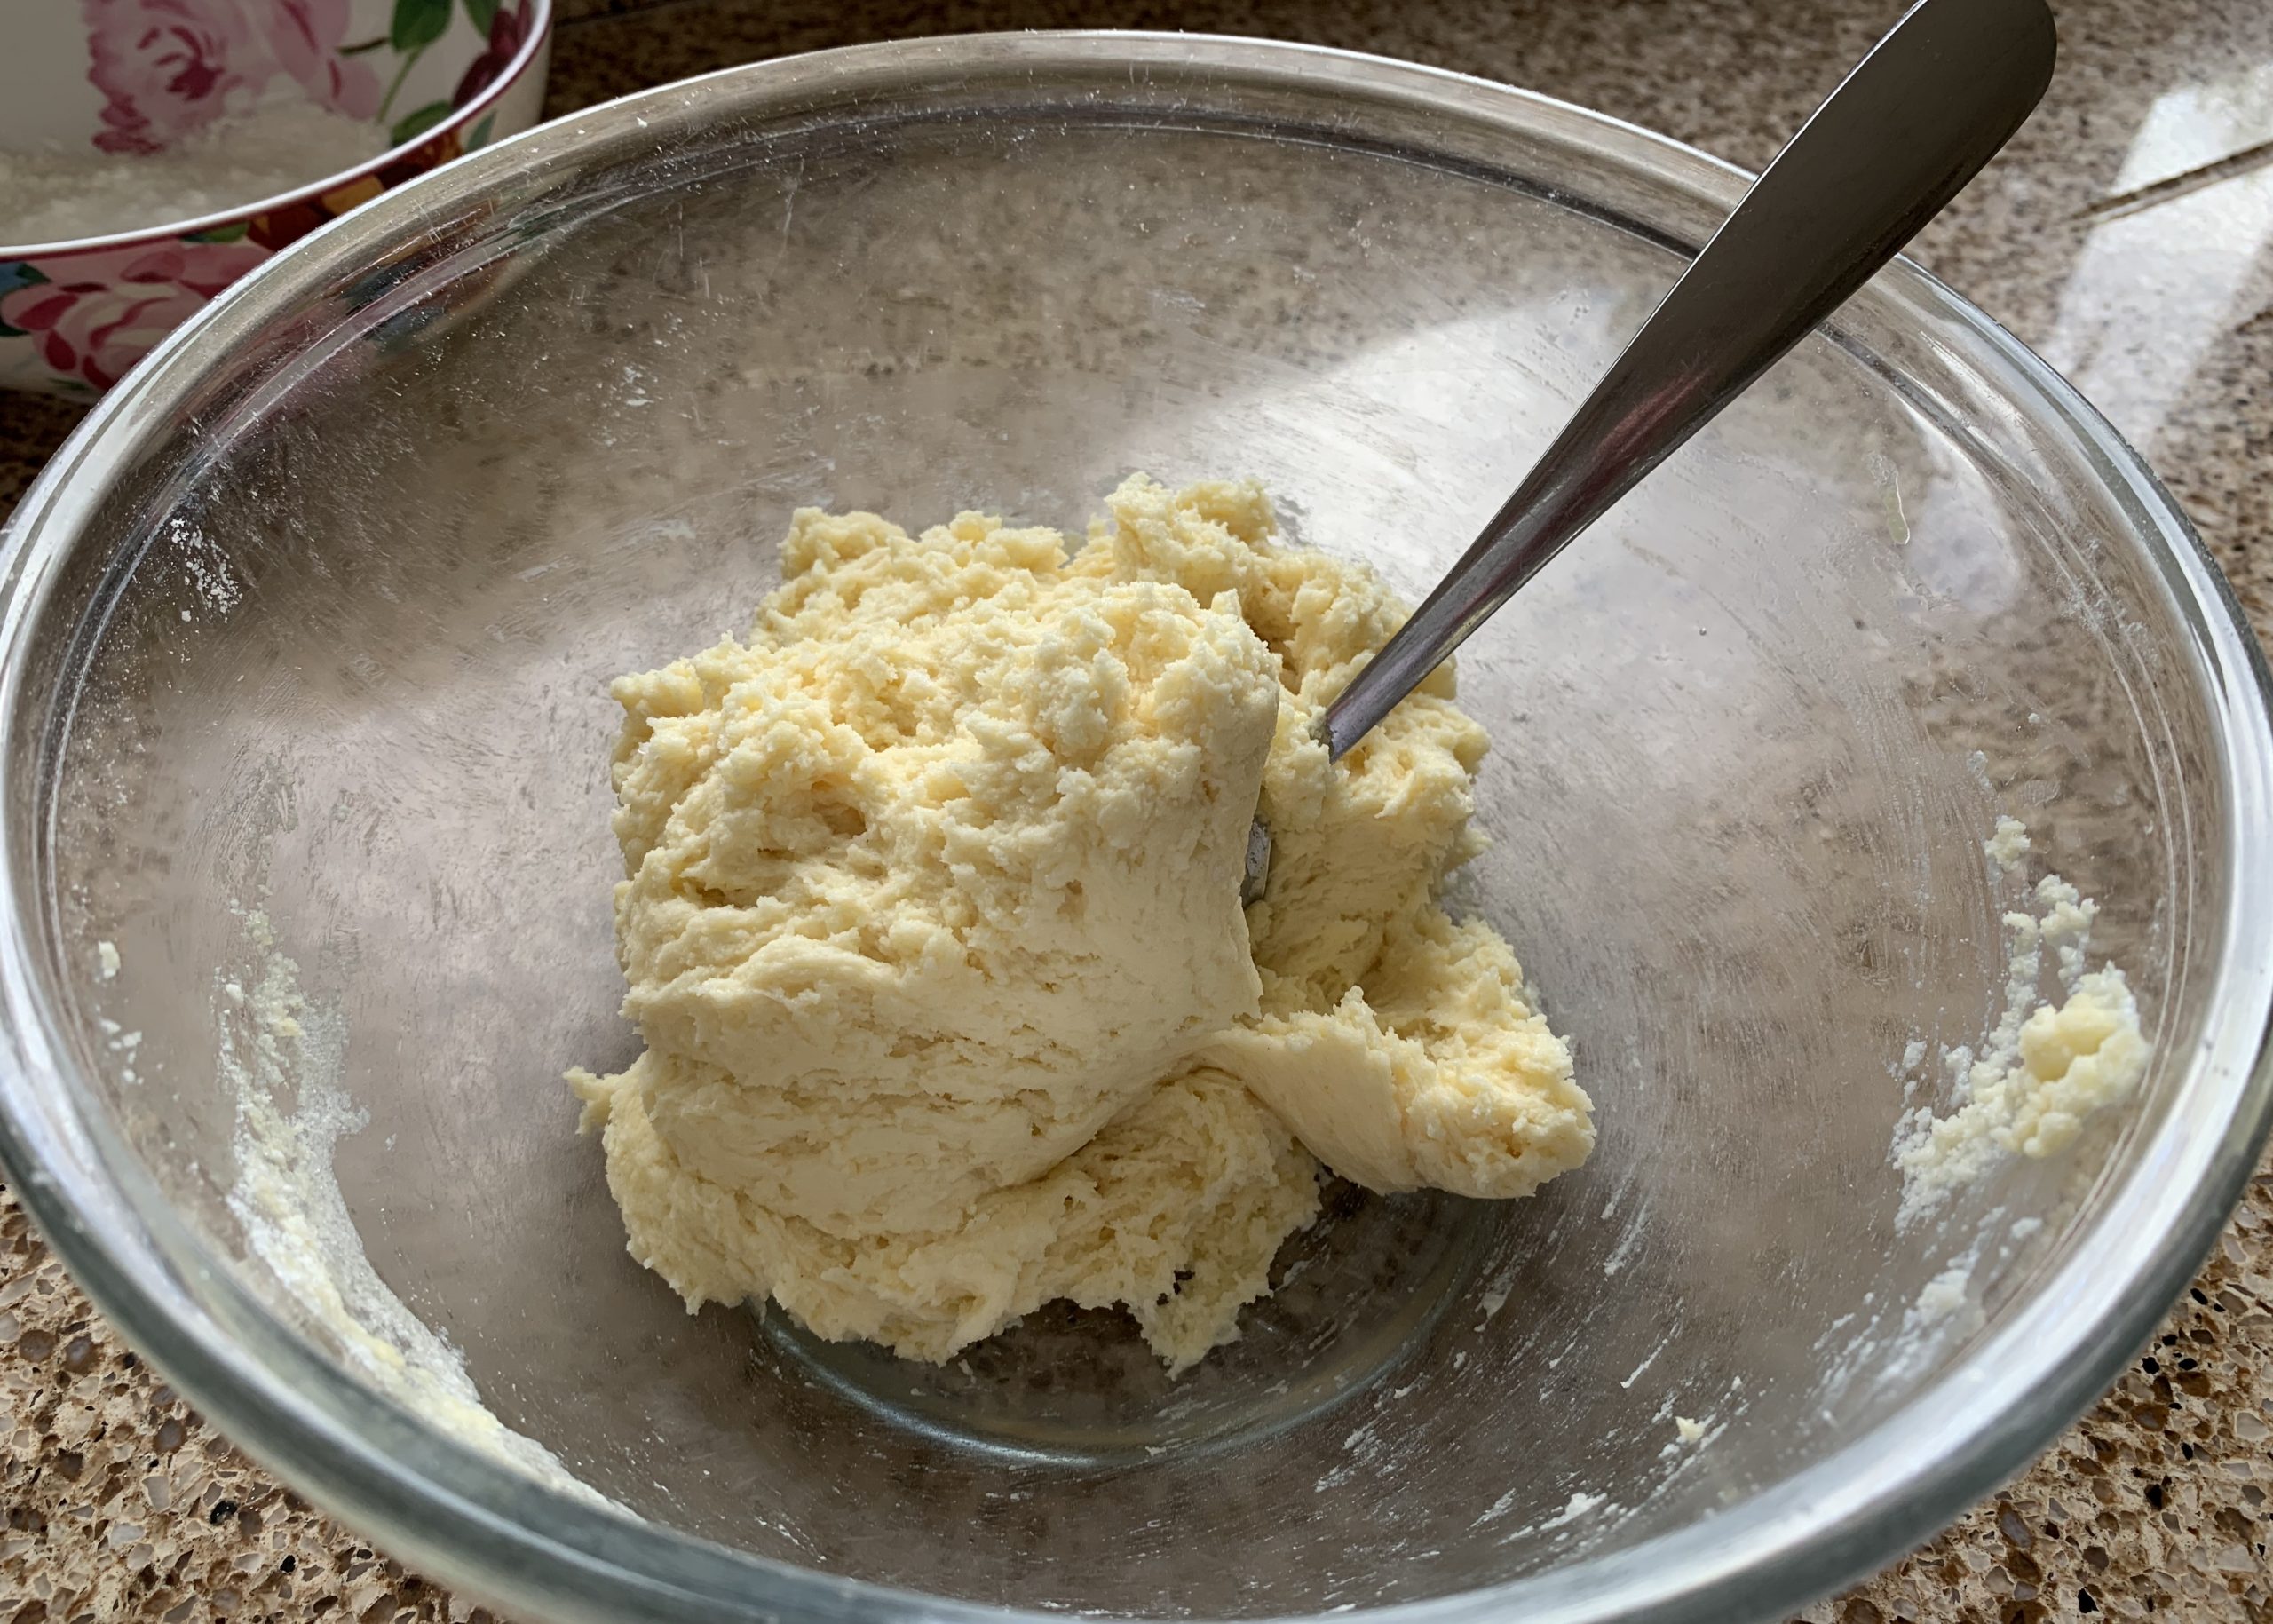
Mix the vanilla extract with the beaten egg and add this to the bowl.
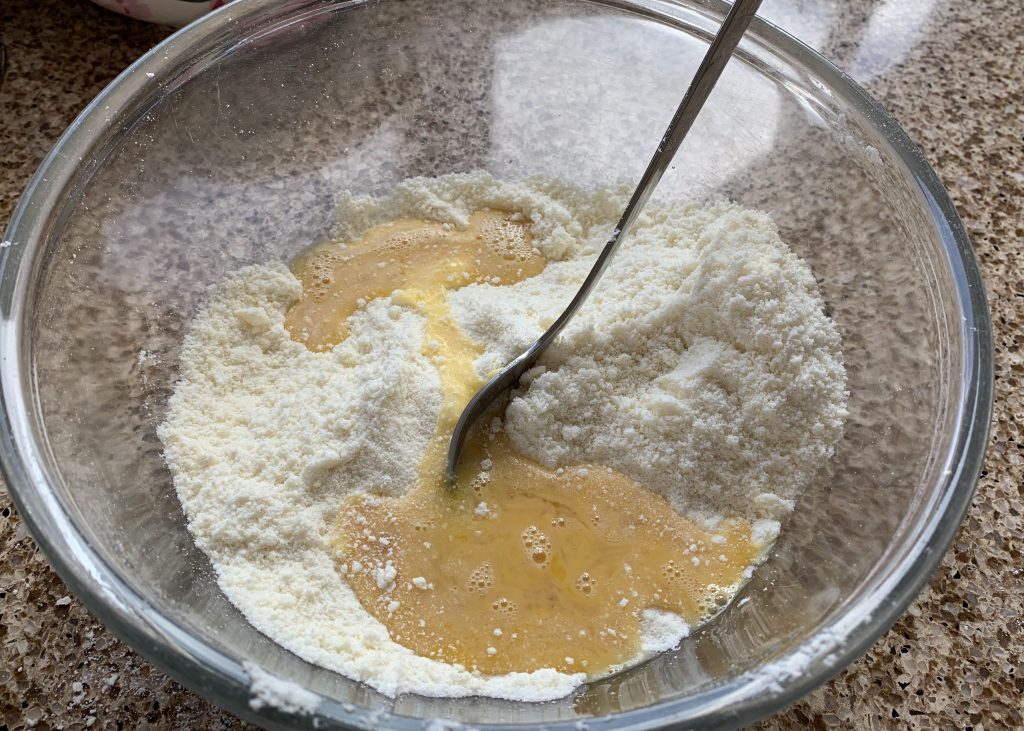
Give everything a really good stir, before slowly adding just enough milk until the mixture comes together and forms a soft, sticky but not too wet dough. Stir for a minute or so with a fork until the mixture cleans the sides of the bowl.
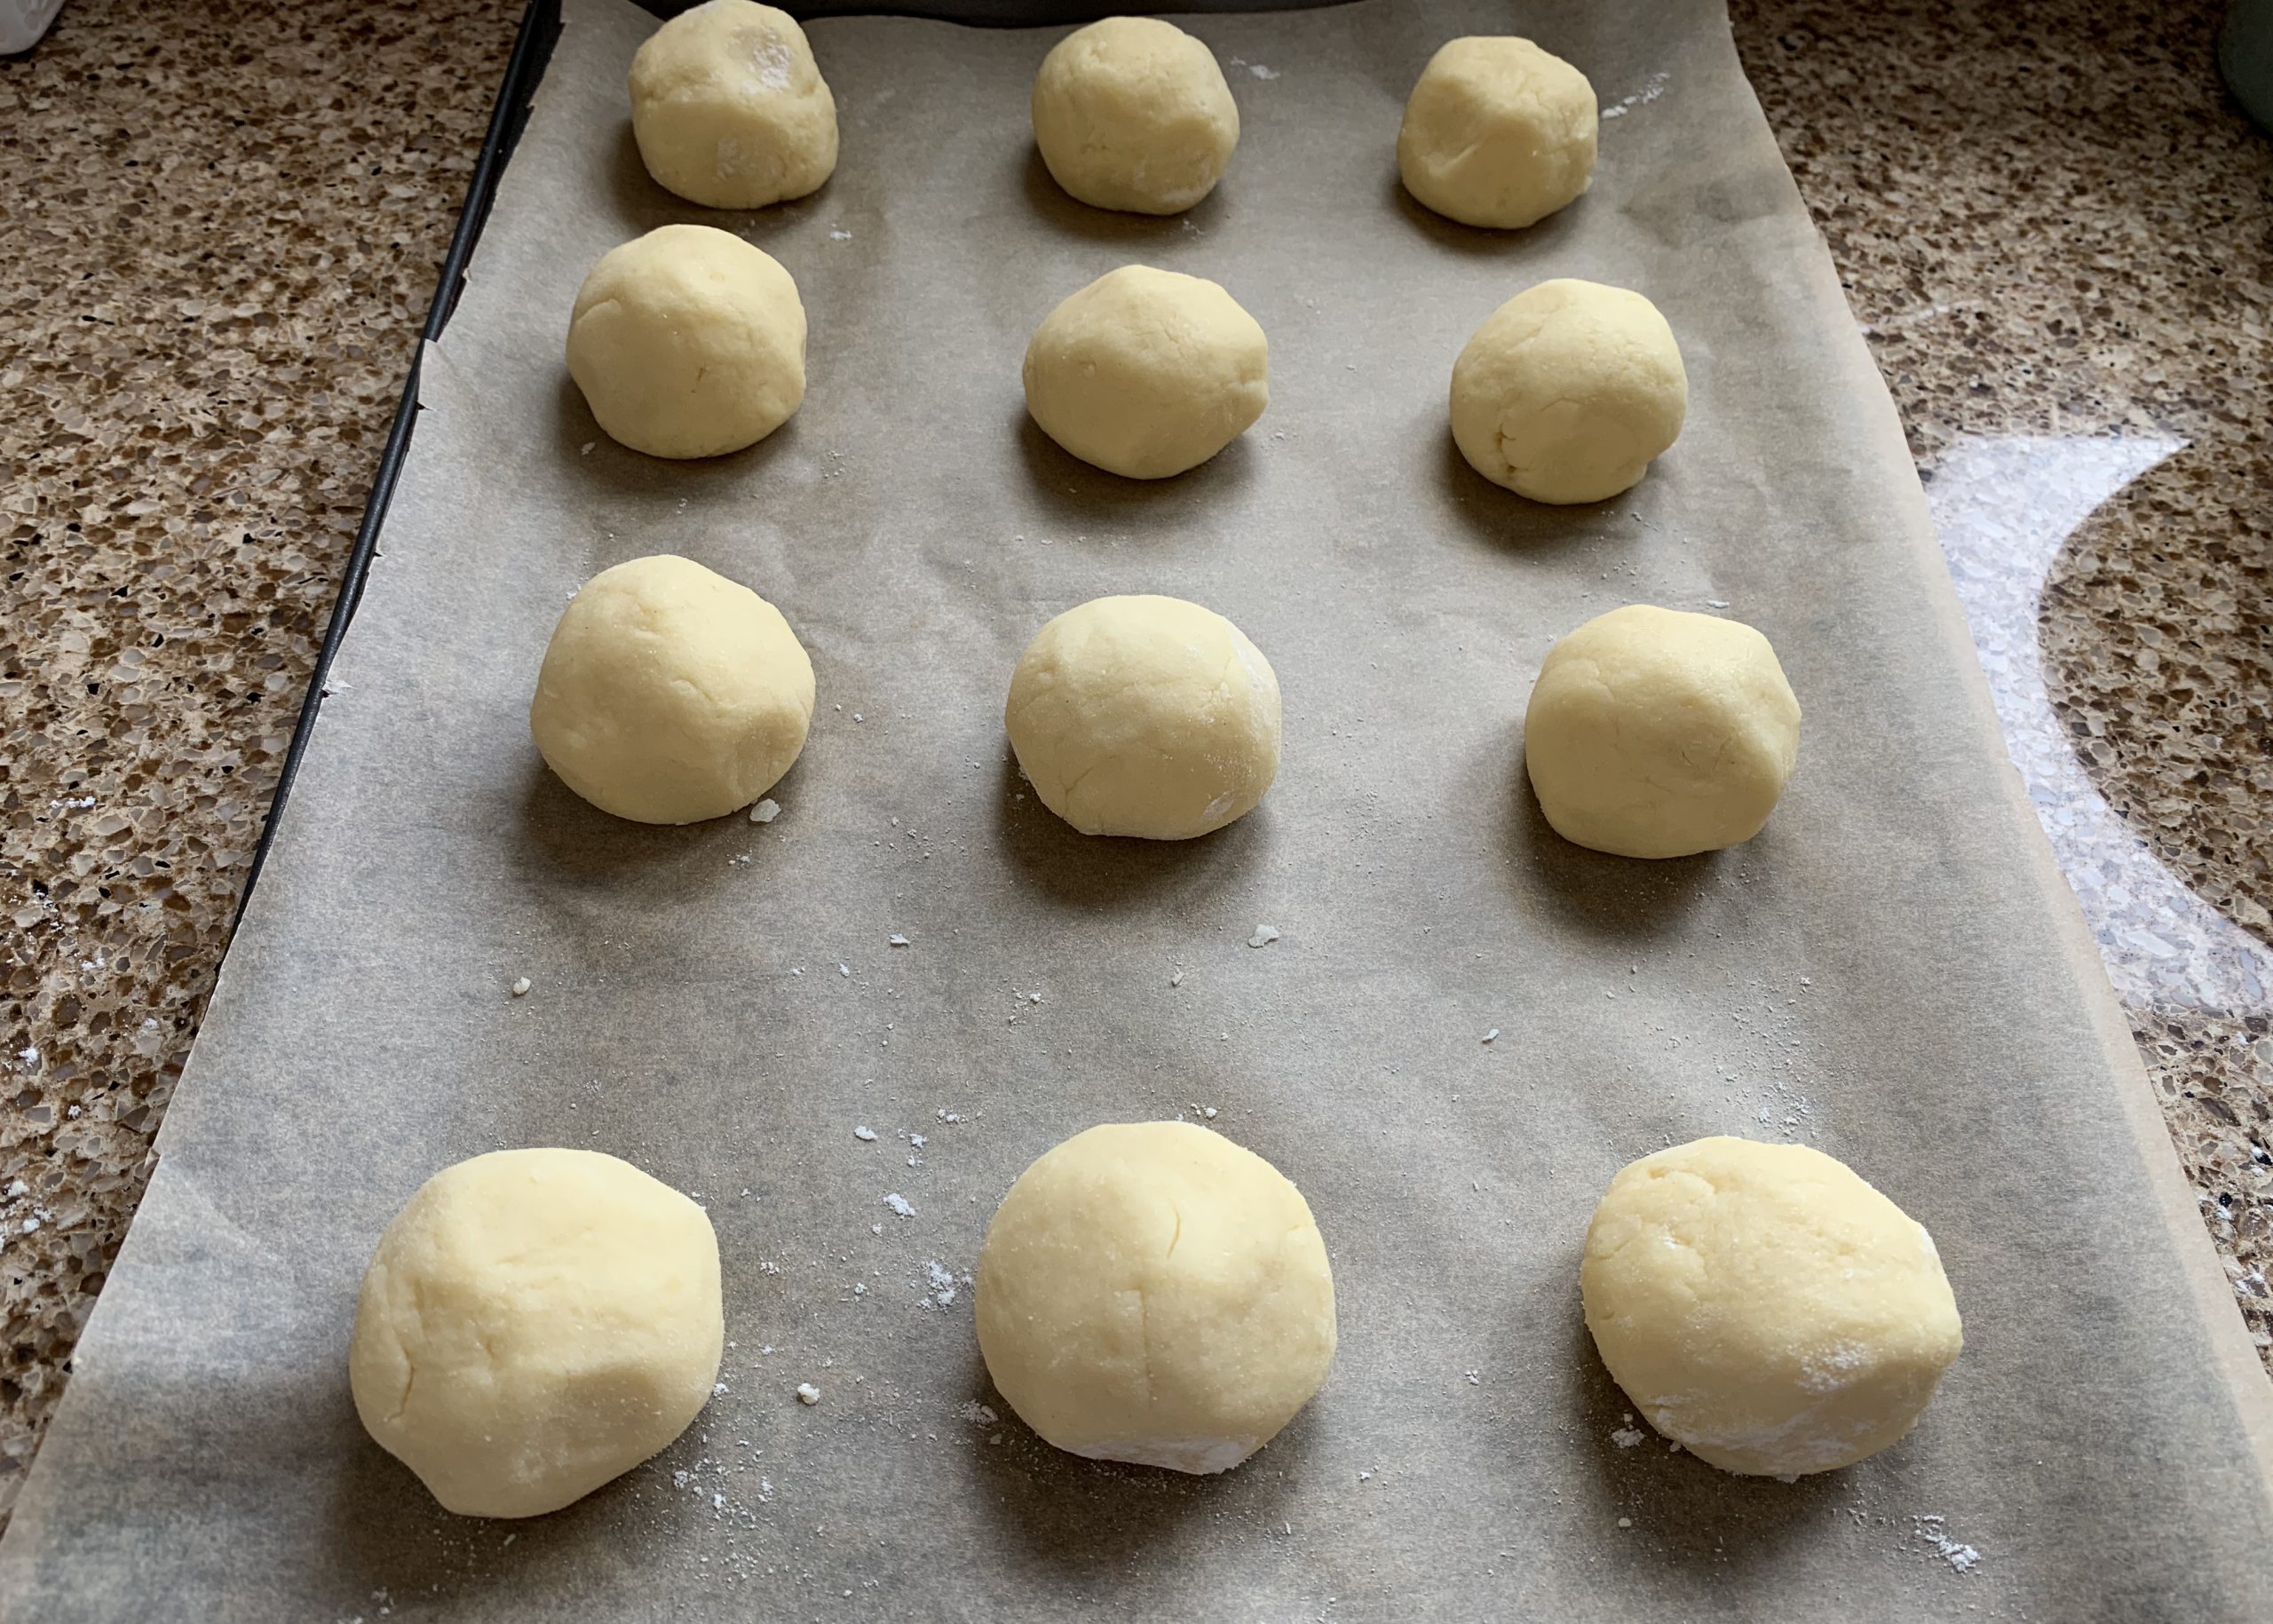
Pop a bit of gf flour into a bowl so it’s nice and handy to flour your hands. Then with lightly floured hands form the dough into small balls (slightly smaller than a ping pong ball) and place them onto the prepared tray.
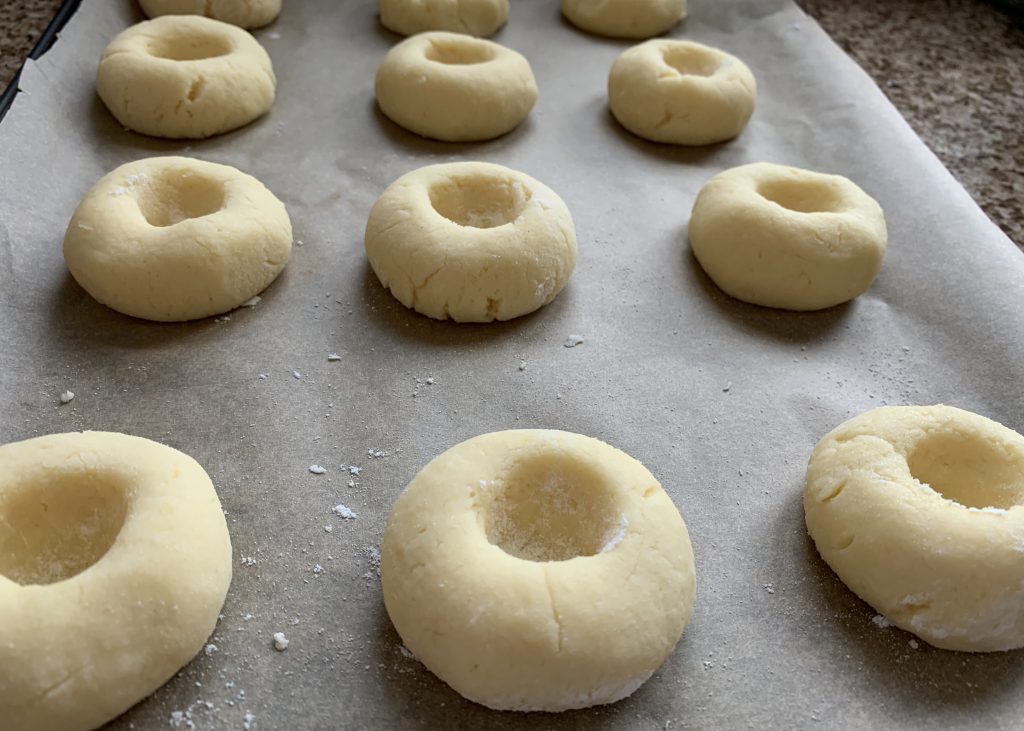
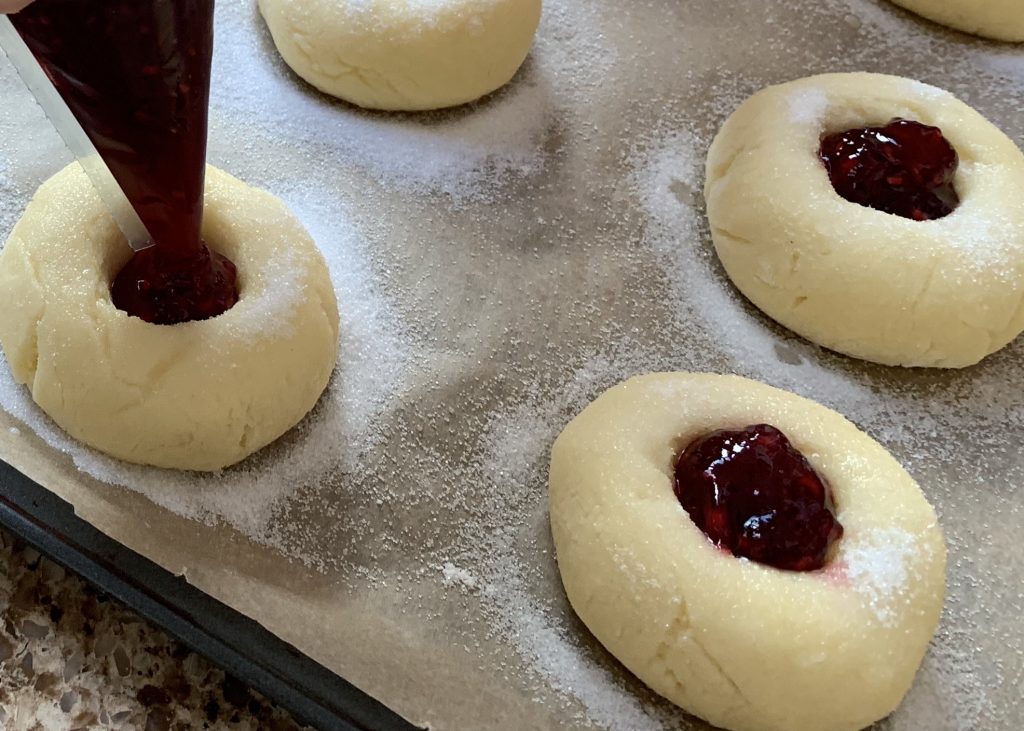
Dip your thumb into the bowl of gf flour then firmly press it into the centre of each ball. You want to go really deep into the dough, but not all the way through. If you wiggle your thumb around a little when you press it in, it will make the hole larger to allow you to add more jam.
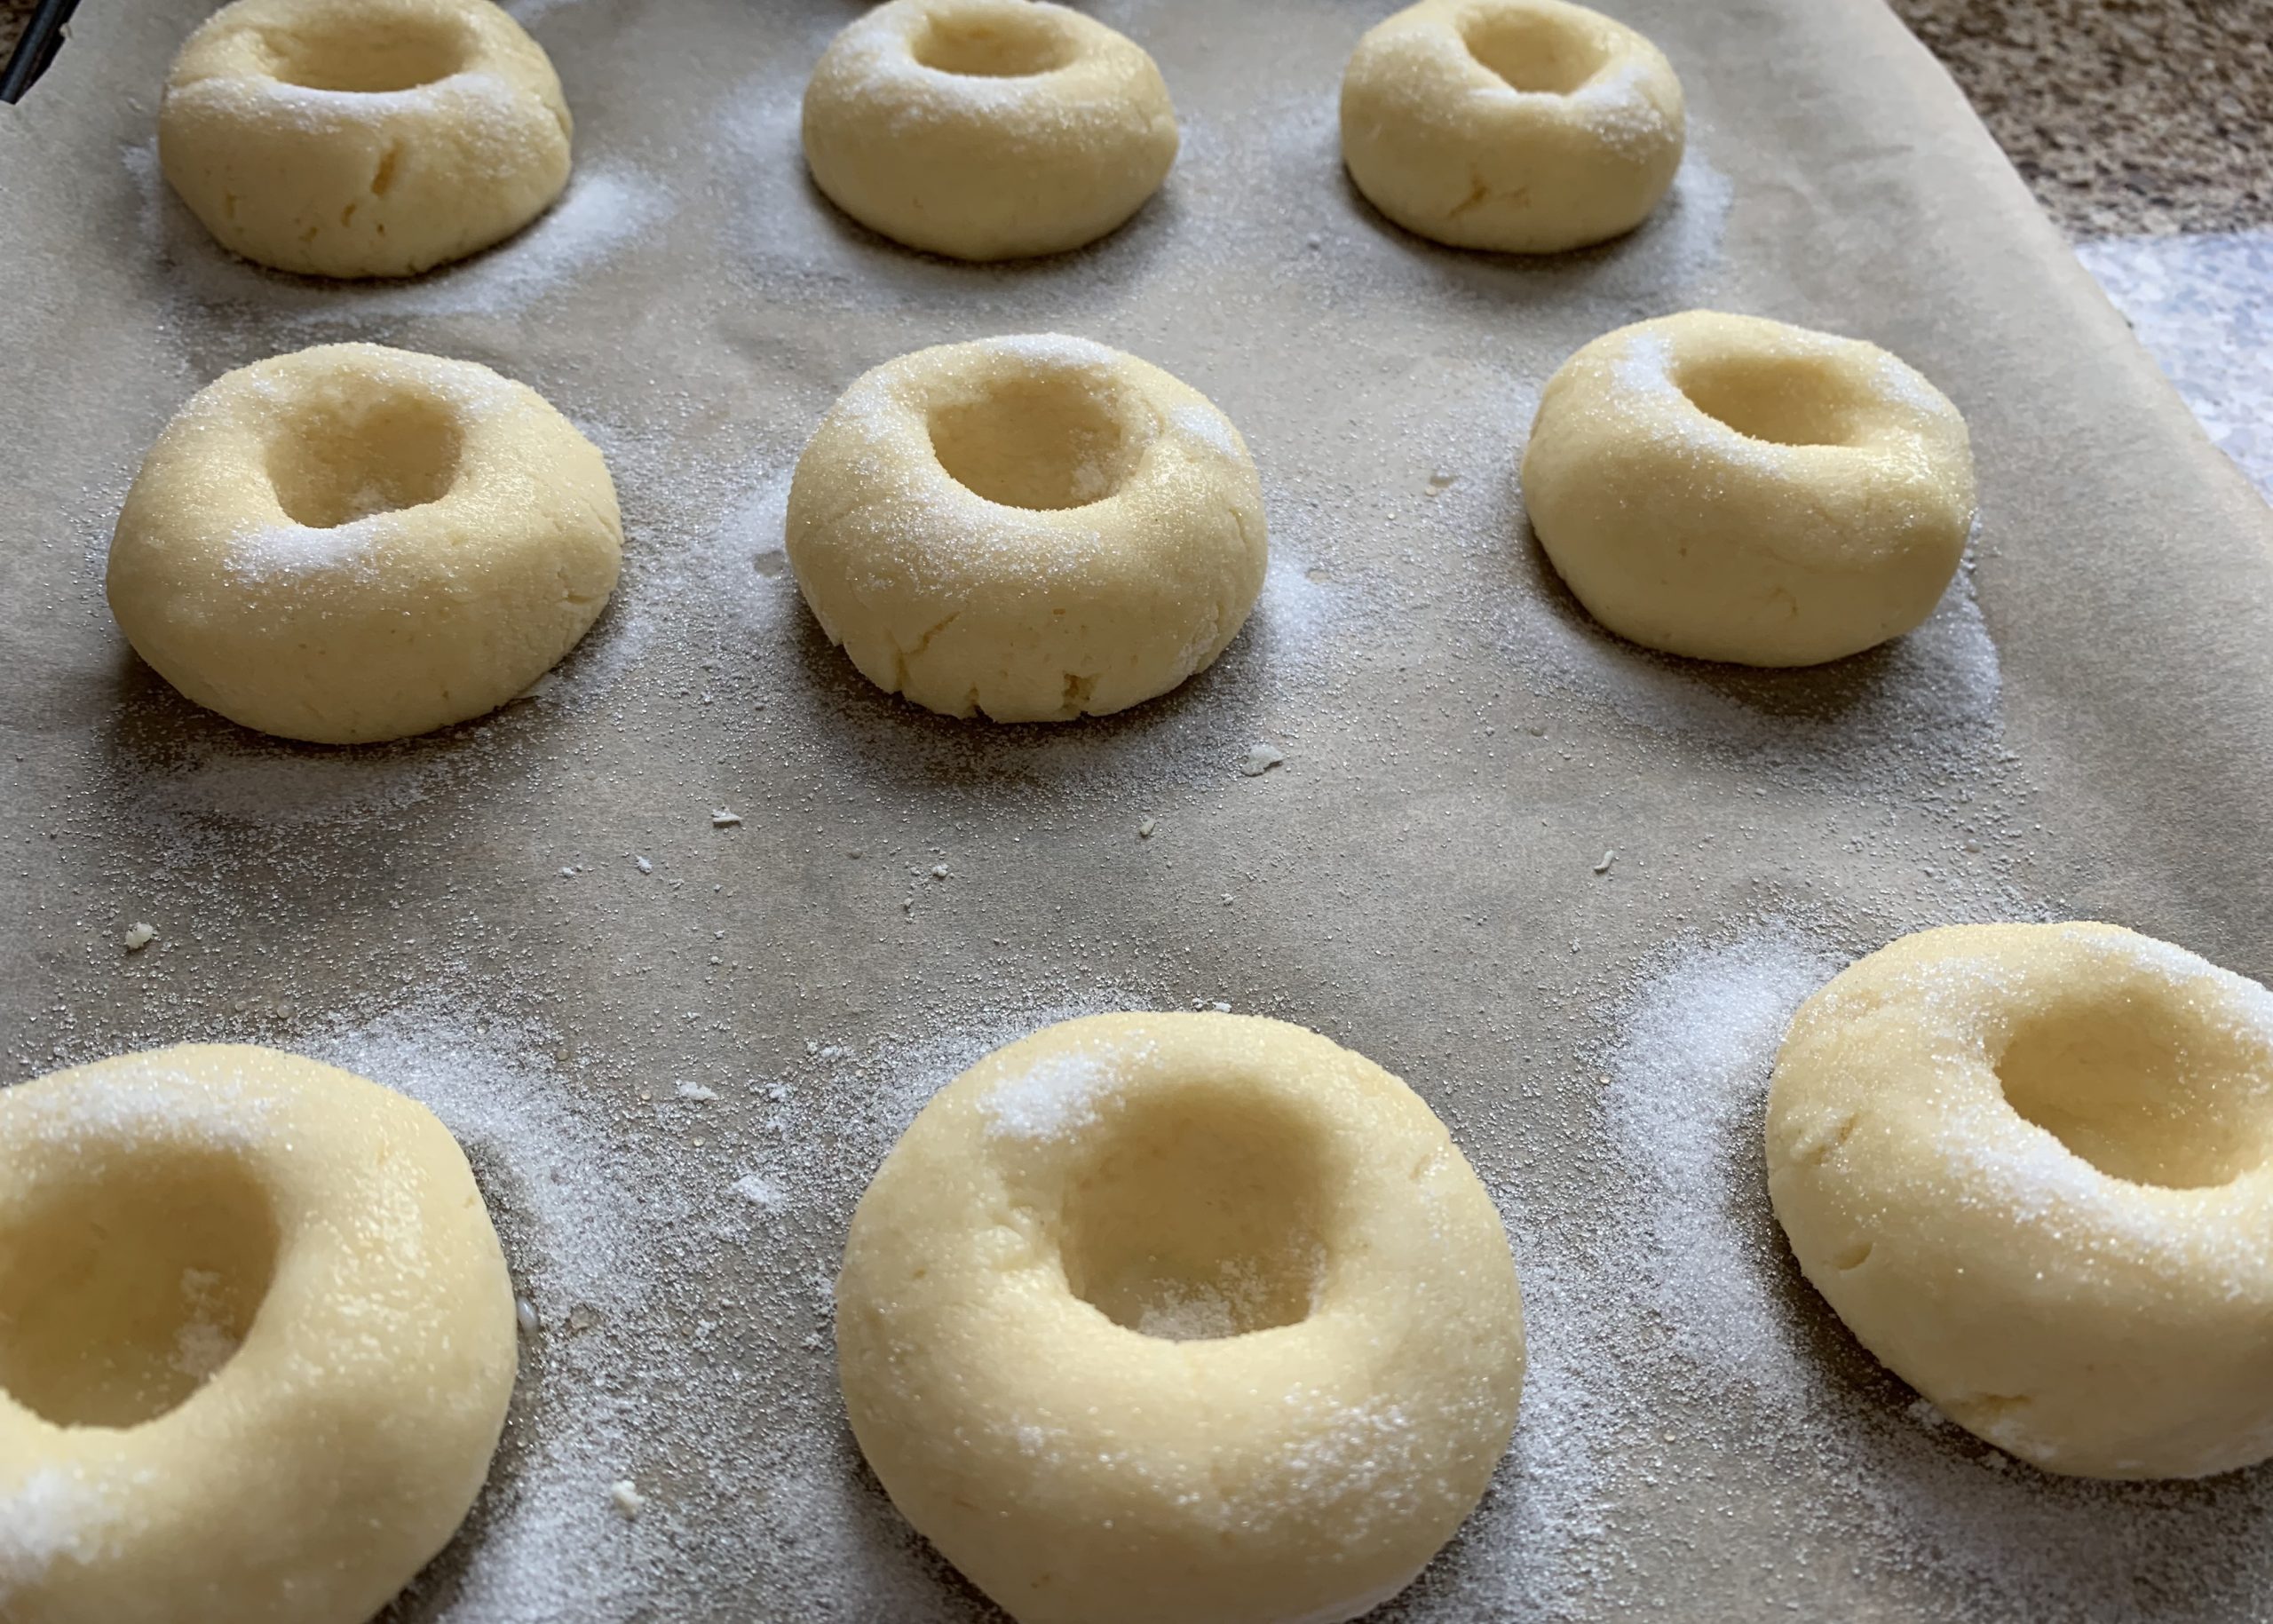
Before adding the jam, brush each bun with a little milk and then scatter over a generous amount of caster sugar.
You can use a teaspoon to fill the buns with jam, but I found it so much easier to use a disposable piping bag to pipe it in instead.
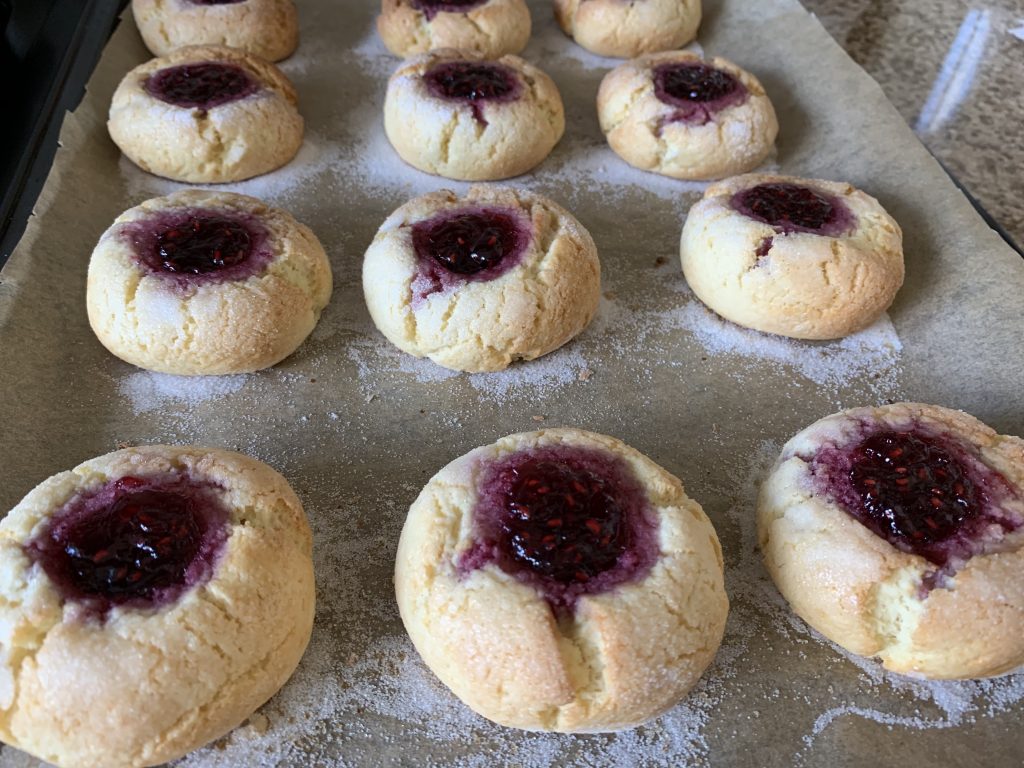
Once the buns are filled with jam, pop the tray into the oven and bake for 16-18 minutes or until golden brown. Remove the buns from the oven and leave to cool before tucking in.
Recipe notes and suggestions:
The buns are at their very best on the same day you make them. However, they will keep well in an airtight container for 2-3 days. They can also be frozen.
I like the size of the raspberry buns I made. A perfect little treat to enjoy with a cuppa. However, by all means make them bigger if you wish, just increase the cooking time accordingly.
Fill the buns with anything you fancy instead of jam. Lemon or orange curd would work really well; maybe also add a little grated orange or lemon zest to the mixture at the rubbed in stage to add a subtle flavour to compliment the filing. Skip adding vanilla extract should you choose to add a citrus flavoured filling.
The base recipe for the raspberry buns is low in sugar, which is great if you are on a low sugar diet. Just switch to sugar free jam and skip sprinkling on the sugar before baking.
To make the raspberry buns dairy free, switch to a dairy free hard margarine and use dairy free milk instead.
Thanks for checking out this recipe. I do hope you like the things I share, and you are now tempted to rustle up some tasty creations of your own.
You can also find a quick demo of me making a batch of these yummy gluten free raspberry buns over on my YouTube channel. Here’s the link.
Please do tag to me on socials, should you get around to making any of my recipes. Thanks so much!
For now,
Liz x
*Check this product to ensure there are no gluten containing ingredients, ‘may contain’ or ‘not suitable’ for a coeliac/gluten free diet warnings on the pack.
Buds going give them a go in the morning, they look scrummy x
I think you will love them buddy! xx
All the family enjoyed your raspberry buns.
I am enjoying following your recipes, keep them coming.
Thanks.
Aww I love the raspberry buns too! Glad they were a hit. Thank you so much for your kind and encouraging words. It means a lot.xx
Absolutely delicious and so easy to make! Ideal for me as I’m coeliac and diabetic. Thanks for the recipe x
You are so welcome! I’m delighted the raspberry buns were a hit for you!xx
Will the buns hold up without xantham gum?
Hi, I’ve not tested them without xanthan gum, but as their texture is quite crumbly, I do feel xanthan gum is definitely beneficial.
Thank you for sharing your recipe Liz. I used to love the regular glutenised ones when I was younger so was very happy to come across your recipe for gluten free buns now that gluten is off the menu for me. Mine turned out really yummy, though I say so myself! Thanks again! 😋
Delighted the recipe was a hit for you, and you can now once again enjoy tucking into something that you enjoyed so much in the past! Thanks so much for taking the time to leave a comment, which I know will inspire others to give the recipe a go! 💫