Updated 30th March 2022
Many people believe that gluten free baking is tricky, but over the years I’ve discovered that it’s really not that much different from standard baking and is certainly worth the effort.
The real push for me to embrace gluten free baking, came when I discovered that most of the time, I was able to make better quality gluten free cakes and bakes than the ones I could buy. And that by making things from scratch, I knew exactly what was going into them too. Also, baking from scratch brings far more variety and pleasure into a gluten free diet.
I thought it may be helpful to share a few hints and tips that have helped me when it comes to gluten free baking.
Master the basics
This is my number one tip. As once you get the hang of making basic gluten free recipes there really will be no turning back and it will throw the culinary door WIDE open to what you can then use these recipes for. So yes, spend the time getting used to making things like gluten free pastry, scones and basic sponge and you will be away.
Quick thing to mention about gluten free pastry. Standard pastry is normally rested after it is made. This is purely done to relax the gluten. As there is no gluten in gluten free pastry you can roll the pastry out as soon as you have made it.
Switch standard recipes to gluten free ones instead
Almost all recipes will work as a gluten free version. Pick out your old favourites and switch the ingredients to make the recipe suitable for you. And don’t be put off treating yourself to a new cookbook just because it’s not a dedicated gluten free one.
Of course, gluten free recipe books will be filled with tried and tested recipes. And if you are new to gluten free baking, they will be the perfect thing to use, to inspire and help you gain confidence in the kitchen.
Find your showstopper (we all have one!)
Finding your own showstopper is like having your own little baking comfort zone. A favourite thing that you can bake on repeat as you adjust to gluten free baking. Safe in the knowledge that it’s going to work for you every time.
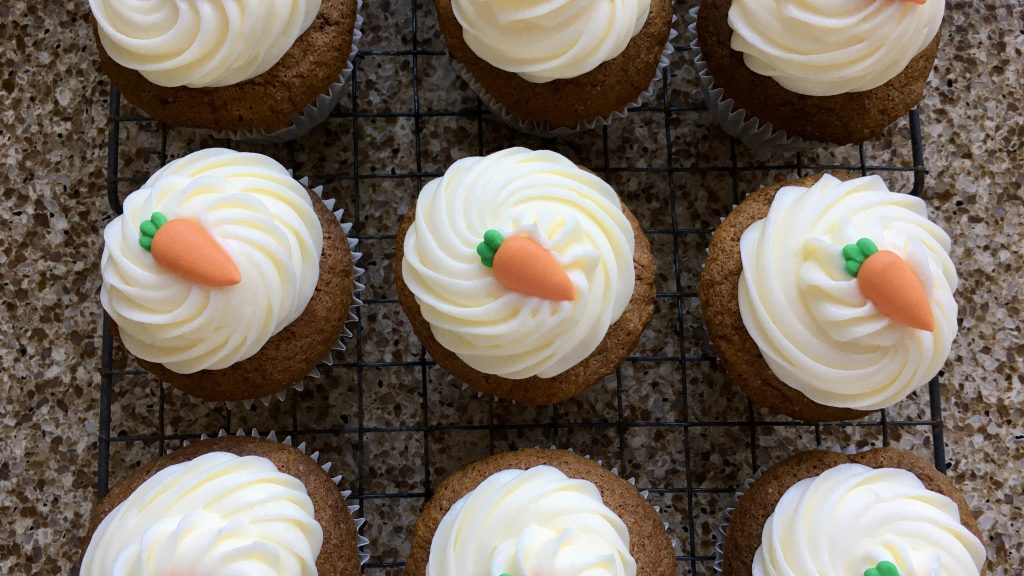
The carrot cake cupcakes you see pictured at the top of this post may just be my showstopper. But, I’m also a huge fan of rustling up a simple vanilla sponge cake; I love its versatility and that I can have one whipped up in about 5 minutes.
What’s your showstopper? The one thing that ALWAYS turns out for you, and what your family and friends constantly request that you make!
Keep a well-stocked (and previously checked) gluten free ingredient cupboard
By keeping a well-stocked cupboard with all your gluten free ingredients on hand, you can grab whatever you like out of the cupboard and whip something up really quickly to enjoy. Super handy and so nice to get a bake on, when it’s a bit yucky outside.
Use the very best gluten free ingredients possible
When I say “the best” ingredients I don’t mean the most expensive, but rather the ones that are of the best quality and that will produce fabulous bakes. So, for example; find your ultimate gluten free flour that performs really well for you (I’m a fan of Sainsbury’s and ASDA’s), the best gf rich cocoa powder and chocolate for your cakes and cookies, great quality *dried fruit and *nuts etc. I have to add here, that full fat milk makes the very best sauces and custards.
Some gluten free recipes will benefit from Xanthan gum
Certain gluten free recipes will be helped on their way, with a little sprinkle of this magic ingredient. Xanthan gum acts like an edible glue, replacing the gluten in gluten free bakes. And whilst it’s beneficial in a lot of bakes, you certainly don’t need to add it to everything.
You will probably find that most gluten free self-raising flour already have xanthan gum added. And for light sponges, the amount within the flour will be sufficient. However, for scones and rich fruit cakes it would be beneficial to add a touch more.
I no longer add xanthan gum to gluten free pastry, as I personally feel it makes it a bit hard.
Use chilled lard or butter instead of suet for dumplings or suet puddings
It can be quite difficult to get hold of gluten free suet, but if you weigh out the equivalent piece of lard, butter or dairy free alternative and wrap it in greaseproof paper and pop into a freezer bag and into the freezer for about ½hr, this can be then grated into the gluten free flour or mix and used instead of gluten free suet. Ideal for making gluten free dumplings.
Preventing cross contamination in a shared kitchen when baking
Our kitchen isn’t completely gluten free, as Neil eats a ‘normal’ diet, so I’m always mindful to give our worktops a really good wipe down with some nice hot soapy water before I start a bake.
Once I’d discovered that I was able to make great gluten free pastry, cakes and bakes that both me and Neil enjoyed, I stopped buying standard flour. This has made life much easier and safer. As should I miss any traces of flour when cleaning down (flour dust gets EVERYWHERE!), it won’t have any ill effect on me now.
And, the more I experiment with gluten free flour the better my bakes seem to be getting too. I also ensure that when I’m baking, I use butter from my dedicated pot and that all our baking trays and utensils are kept nice and clean. And unless covered, I will always put my gf bakes on the top shelf of the oven to ensure nothing can fall or drip on them.
General baking hints and tips
Get prepped. Weigh out all the ingredients and grease and line the tins you need before you start. Give yourself plenty of time in the kitchen (if you can) and try not to rush things. Really try to enjoy the time you spend baking, rather than feeling it’s just another chore.
Bake with eggs stored at room temperature.
Lurpak spreadable butter (not the low-fat variety) is great for making cakes that require mixing, as it is soft enough to use straight from the fridge.
Hard unsalted block butter is best for pastry, scones and recipes that require you to melt the butter. It’s also the perfect for buttercream and cream cheese frosting – just leave out of the fridge for about an hour before you need to use it.
Line baking trays with baking parchment to stop things sticking.
Paper loaf and cake tin liners are much more convenient to use.
Save crusts or slices of bread that are still OK but are maybe a little dry and whizz them up into breadcrumbs. Once blitzed transfer them into a freezer bag (or container), seal, label and pop them into the freezer.
Roll out leftover pastry and line a freezer-proof flan dish. Wrap the dish in foil, label it and then pop into a freezer bag and into the freezer to use when time is short.
Use cold fillings when making pies. This will prevent the pastry becoming soggy before you have had chance to bake it. And also will ensure the overall texture of the pastry is much better too.
If you require gluten free SR flour but you only have plain flour, add 1 level teaspoon of gluten free baking powder to every 225g (8oz) of flour.
Make a batch of crumble and transfer it into a freezer bag or airtight container and store in the freezer and use to sprinkle over fruit for a quick warming pud. The crumble will keep really well in the freezer for up to two months.
Freeze leftover plain or jam filled sponge cake and defrost and use at a later date to make a trifle or enjoy with a spot of custard.
Bake a batch of plain sponge buns and pop them in the freezer. They will defrost really quickly and can be then either decorated with icing or buttercream. Or you can heat them with a spot of jam, syrup, lemon curd and enjoy them with some nice hot *custard.
Useful kitchen equipment
I’ve just listed a few things that I find really useful and helpful when producing the recipes I share with you:
Disposable piping bags and nozzles – I know we are all trying to cut down on waste, but these bags are recyclable and much more hygienic to use than the traditional cloth ones that you wash.
Silicon pastry brushes – these are great as can be thoroughly cleaned.
Rolling pin – I got this wooden one from John Lewis and love it! I only use it for gluten free bakes and wash it separately too.
Colanders – I’m slightly obsessed with these ones I recently bought from Lakeland.
Sieve – ideally large and small.
A decent veg knife – a couple of these would come in handy.
Micro blade – ideal for grating lemon, lime and orange zest and garlic.
Scales – the electronic ones that you can place a bowl onto and reset zero to add more ingredients, are just the ticket.
Various size mixing bowls – Pyrex, pot and stainless steel are all ideal.
Balloon whisk
Palette knife
Baking trays – shallow, deep, large and small.
Muffin tins
Small bun tins – for fairy cakes and tarts.
Sandwich tins – standard size 8inch (20cm).
1lb, 2lb, 4lb loaf tin
Flan/quiche dishes – but only if they are your thing. I have a well loved, large selection of these, as I have inherited my mum’s and grandma’s collection.
Stick Blender – marvellous for blending soups and sauces.
Mini chopper – perfect for chopping herbs and garlic/onions etc.
Electric hand mixer – wouldn’t be without this, as I’ve not yet got myself a freestanding mixer.
I do hope these baking hints and tips have helped and you are now eager to get into that kitchen of yours, pop on the radio and enjoy a good old bake!
Please drop me an email if you have any specific baking queries and I love to hear from you and will always do my best to help.
Happy baking!
Liz x
*Check this product out to ensure no gluten containing ingredients or ‘may contain’ or ‘not suitable’ warnings on the pack. If in doubt leave it out.

