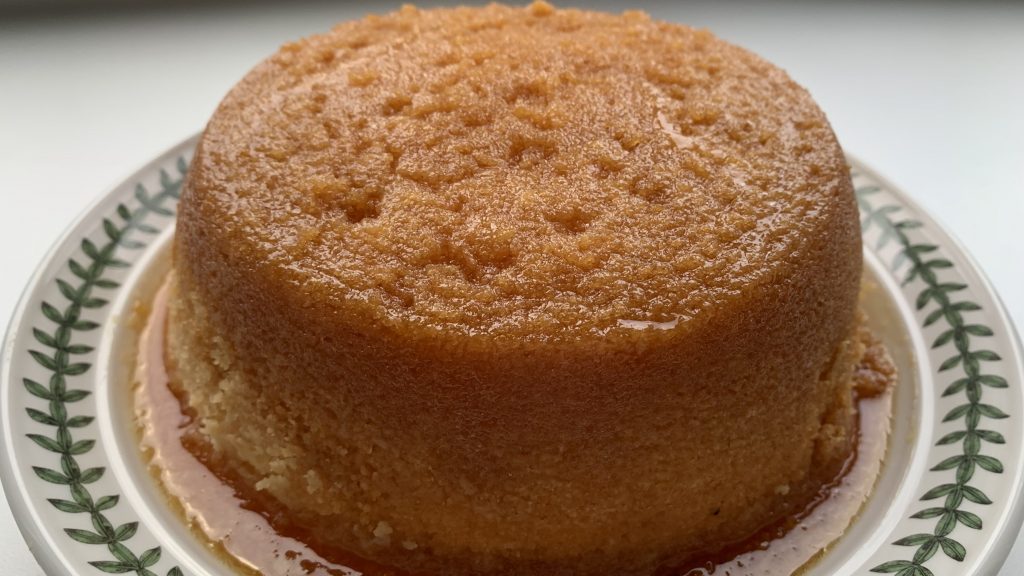
It’s with sheer delight, that I share this truly scrumptious gluten free steamed syrup sponge recipe with you. I have a steamed jam sponge recipe already on the blog, but I know how popular steamed syrup pud is, so I thought you wouldn’t mind me tempting you with this one too.
The original recipe I used to make this gluten free steamed syrup sponge came from Nigella Lawson’s ‘How to be a domestic goddess’. It’s one of my favourite recipe books and this is the third recipe from the book that I’ve adapted to be gluten fee and shared so far. Butterfly cakes and a ganache filled/topped chocolate cake are the other two.
This gluten free steamed syrup sponge is extremely easy to make, and would make the most perfect treat to serve up to friends and family. Ideally, make your main course nice and light, so they have enough space left in their tum to squeeze in a slice of this soft, syrup drenched sponge. YUM!
Ingredients (serves 6-8)
For the sponge
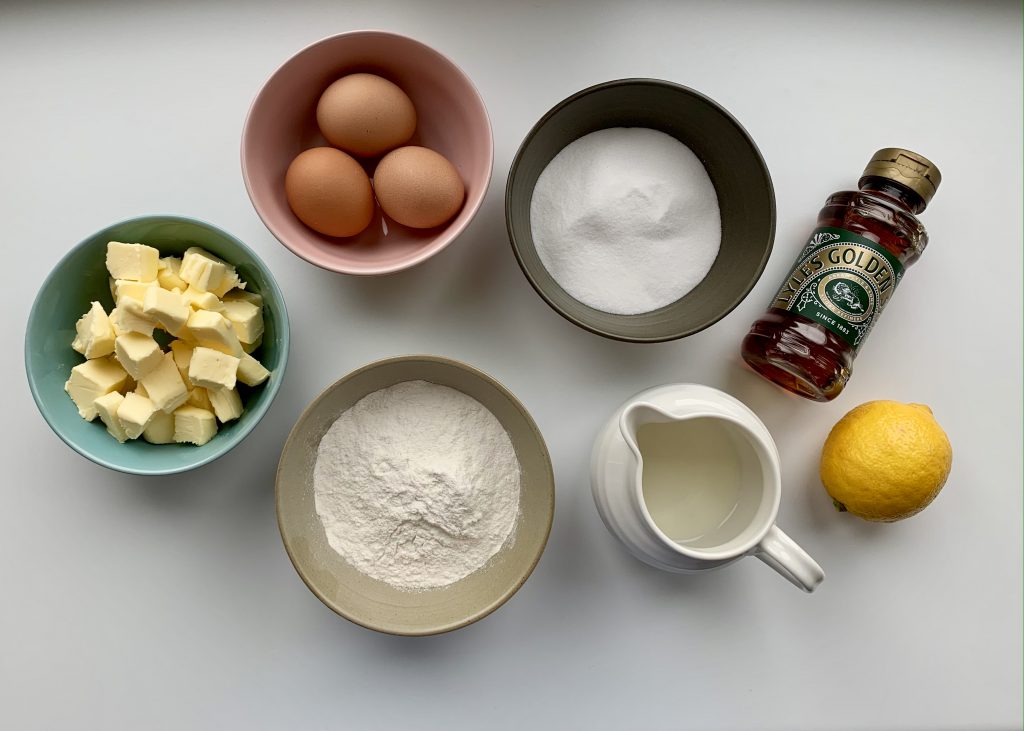
175g (6oz) softened unsalted butter
175g (6oz) gluten free self-raising flour or mix (add ¼ teaspoon of xanthan gum if this or guar gum is not in already in the flour)
175g (6oz) caster sugar
3 large eggs, room temp
3 tablespoons milk (any milk will do)
Zest of 1 unwaxed lemon and juice of ½
For the syrup base/topping
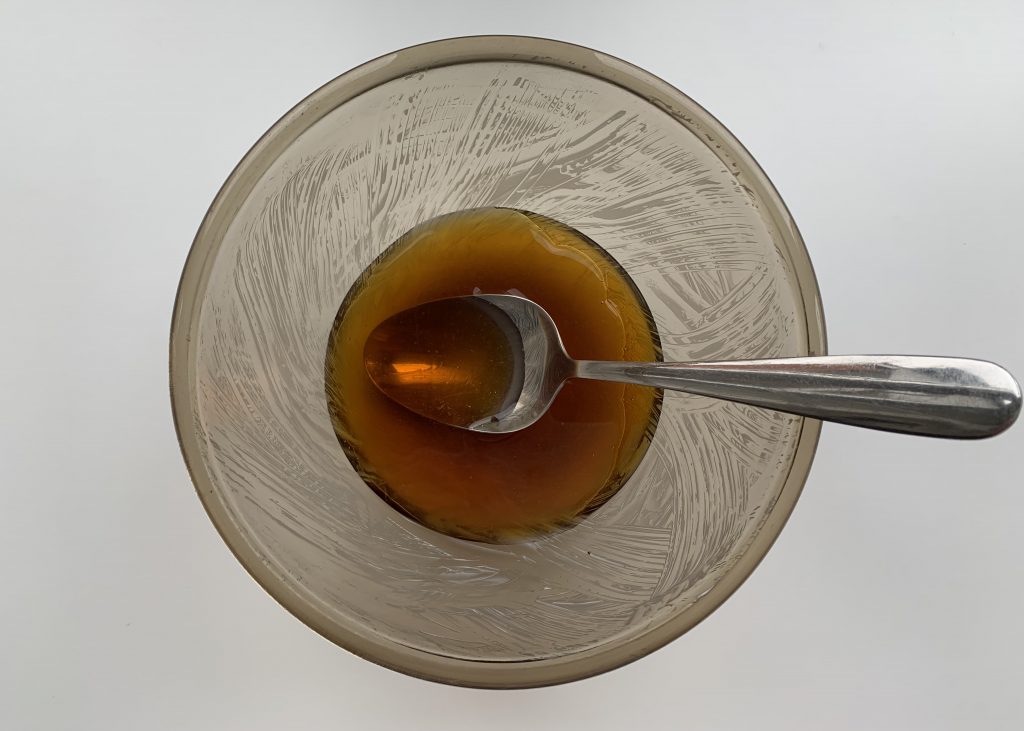
250g (9oz)*golden syrup
Juice from other ½ of lemon
Method
Fill the kettle and pop it on to boil.
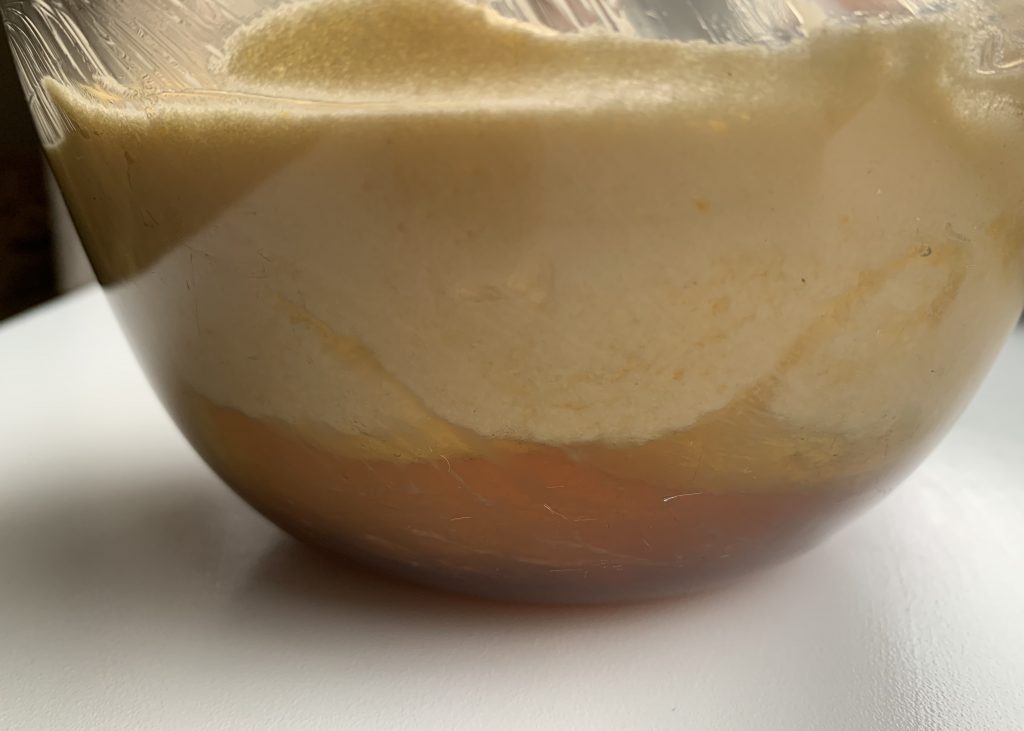
Butter a 1¾ litre heatproof pudding basin (I used a smaller one, but I recommend you use the size suggested in the original recipe). Pour the syrup into the prepared basin and stir in juice from ½ of the lemon.
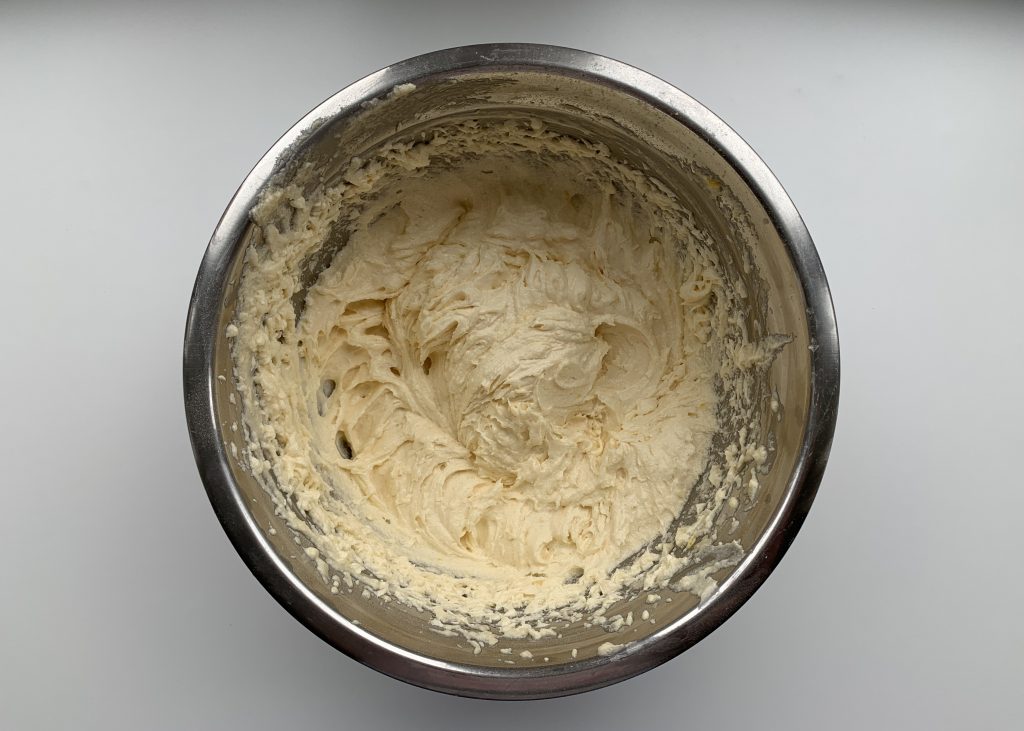
Place all the ingredients for the sponge into a large mixing bowl.
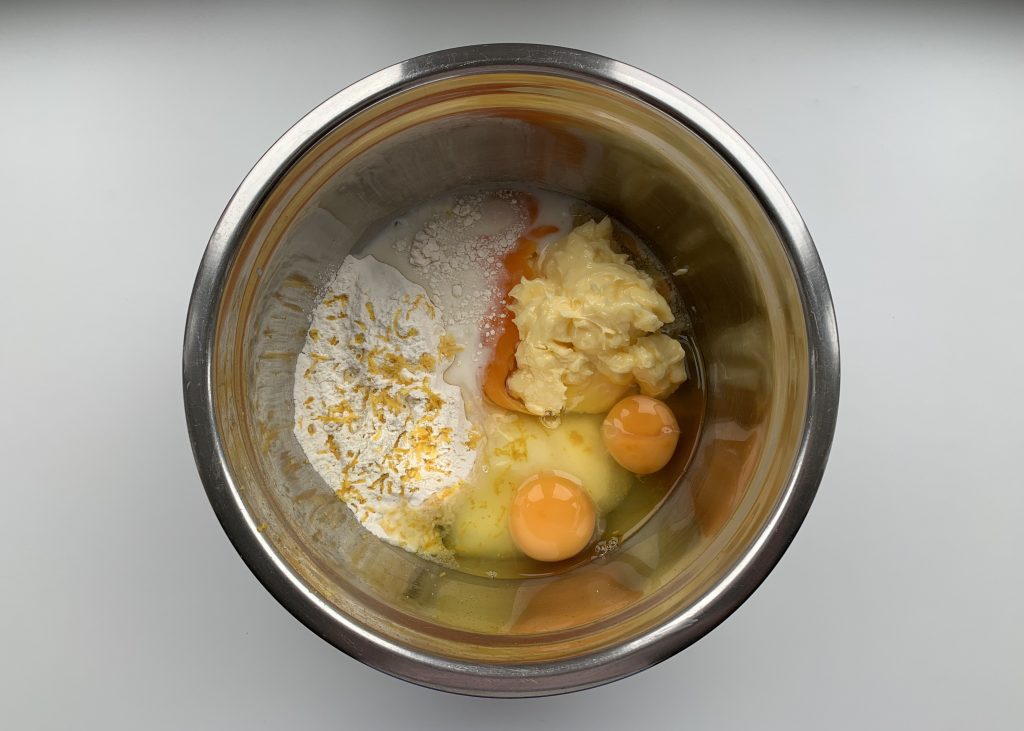
Using a stand or electric hand mixer (Nigella suggests using a food processor, should you fancy using instead) whisk for a few minutes until the mixture becomes pale and creamy. I found that initially the mixture looked a little curdled, but after scraping down the sides of the bowl a few times and giving it a brisk whisk again the consistency was OK.
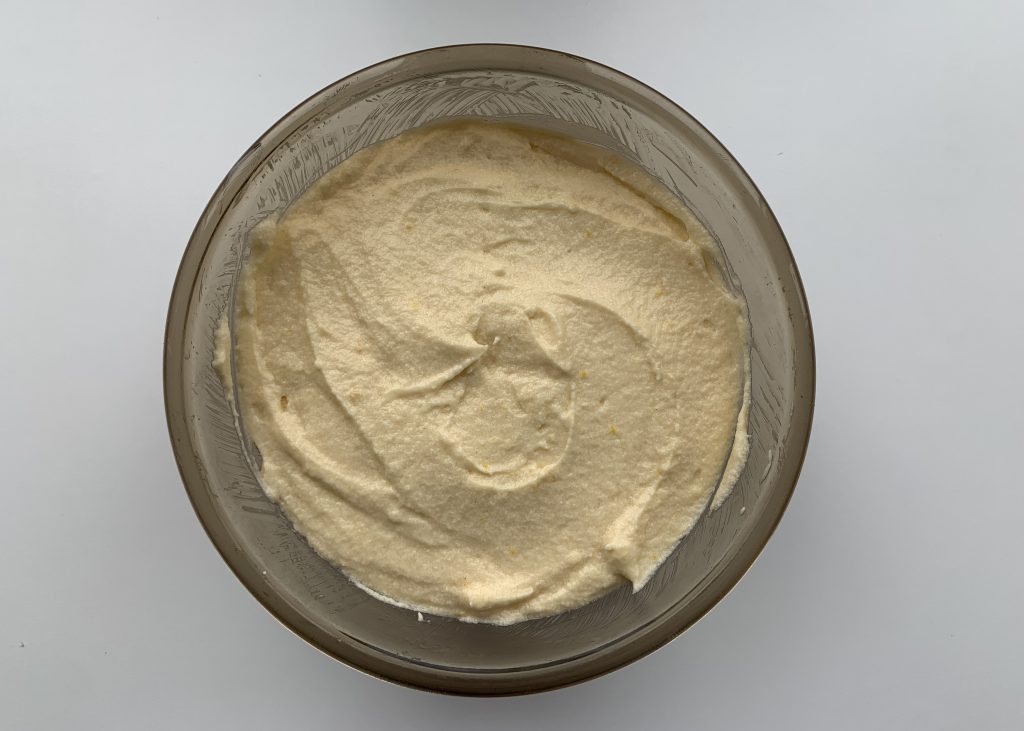
Grab a large spoon and gently spoon the sponge mixture into the prepared pudding basin. Take care not to disturb the syrup too much.
Smooth the mixture down with the back of the spoon.
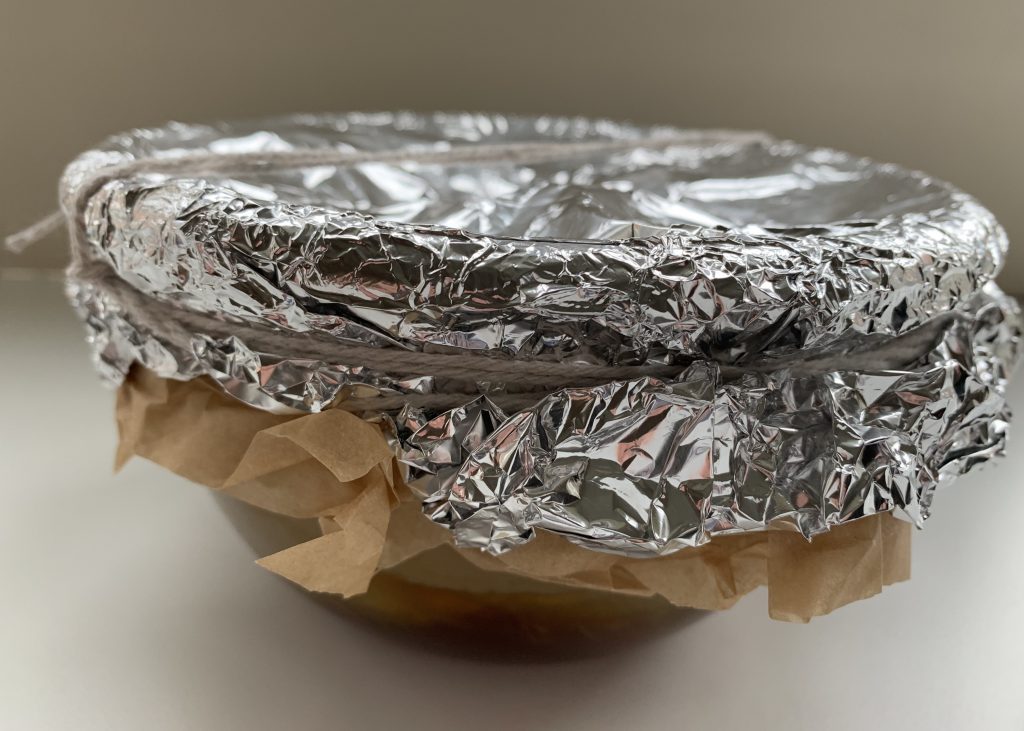
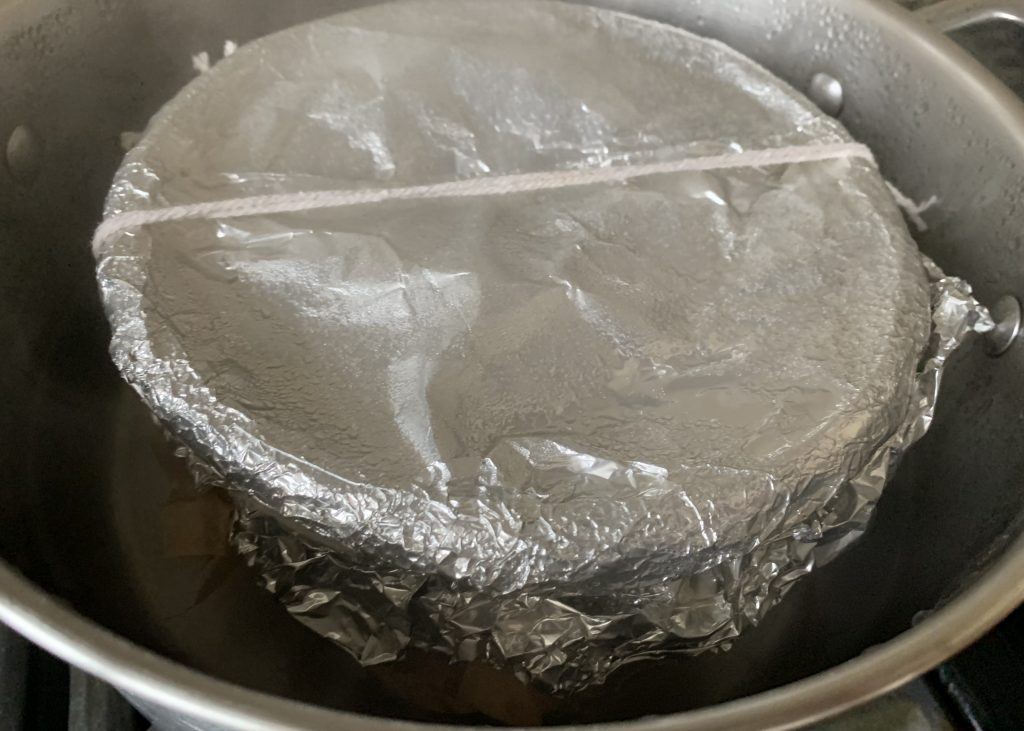
Cut out a circle of greaseproof paper. One that is large enough to completely cover the basin and give you about a 2 inch overhang. Add a fold to the greaseproof to give the sponge space to rise. Lay the greaseproof over the basin and cover with a piece of foil (that’s also been pleated in the middle). Secure in place, by tying string tightly around the edge of the basin. If you tie a sturdy ‘string handle’ across the top of the foil, it will make it much easier to lift the pudding out again once it’s cooked.
To Steam: Place the basin in a steamer and set over a pan of boiling water and cover with a lid. If you don’t have a steamer, you can instead, pop it into a large pan. In my steamed jam sponge pudding recipe I suggest that you place the basin onto an upturned heatproof saucer or plate in the pan, Nigella said all would be OK without bothering with this bit. I tried, and it was.
Pour enough boiling water into the pan (around the basin) until it comes up to halfway up the basin and cover with a tight-fitting lid. Bring the water to the boil and then reduce the heat to a gentle simmer and steam for 2hrs 15mins. Keep having a glance at the water level and add more boiling water from the kettle as and when needed.
Once the pudding has cooked, grab a dry cloth and carefully remove the basin from the steamer and leave to stand for 5 minutes. This will give the syrup chance cool ever so slightly. After this time remove the foil and paper. Gently run a knife around the top of the sponge to loosen.
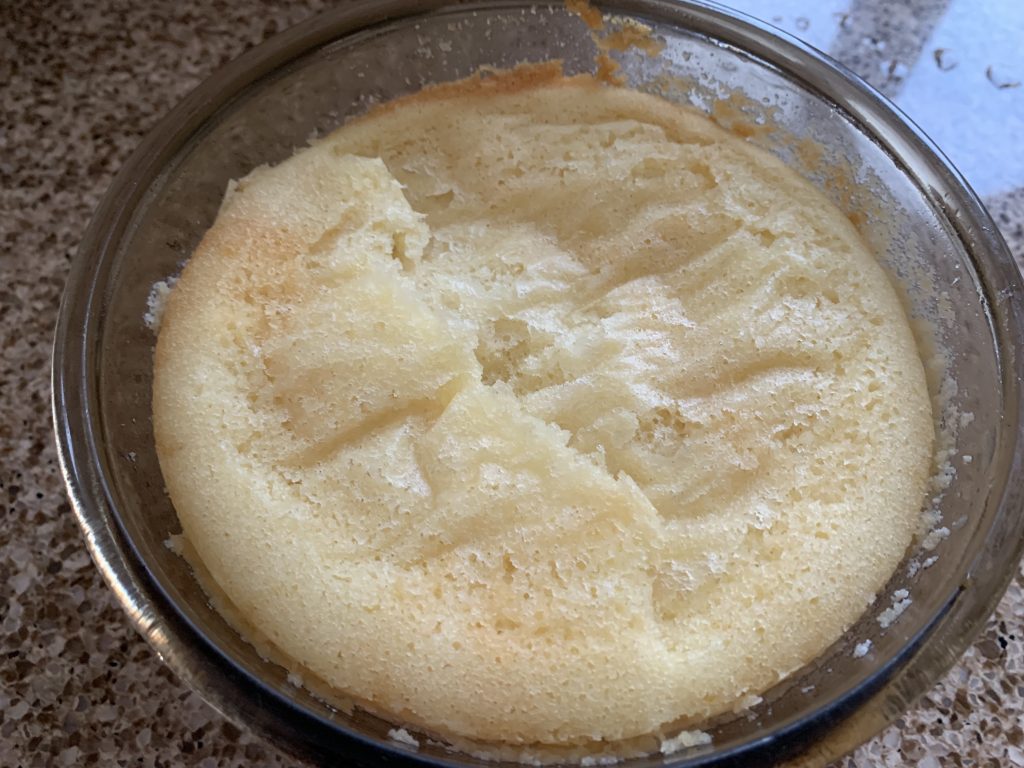
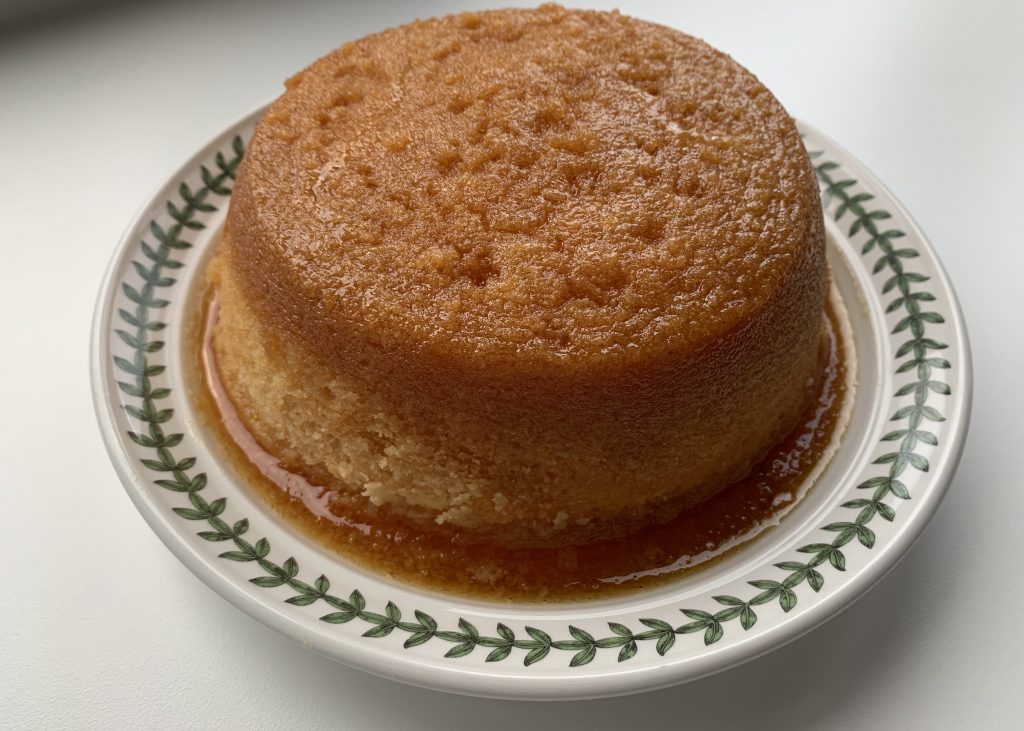
Then placing a large deep plate with a sauce-saving lip over the basin and protecting your hands well with a dry cloth (hot syrup causes a horrid burn if it gets on your skin) tip the pudding upside down and onto the plate. And now it’s ready to enjoy!
Recipe notes and suggestions:
To get the ultimate pleasure from this delicious pud, I suggest you slice and tuck in once it’s turned out. Whilst the sponge will keep, and still be extremely yummy for 2-3 days, the syrup will soak in and it won’t be quite as squidgy as when it’s first cooked. To liven things up a little, you can trickle over a little additional syrup before reheating the sponge.
If by chance you have leftovers, the sponge can be frozen. I’d suggest portioning and wrapping it up well, before freezing. Best to pop a label on beforehand too!
As syrup sponge is really sweet, it’s best served up with things less so. I know steamed syrup sponge and *custard are a match made in heaven, but I think chilled fresh cream poured over the top would work wonderfully too.
Thanks for checking out this gluten free steamed syrup sponge recipe. Credit to Nigella Lawson for the original recipe I worked with.
For now,
Liz x
*Check this product to ensure that there are no gluten containing ingredients, ‘may contain’ or ‘not suitable’ for a coeliac/gluten free diet warnings on the pack.
Sounds fab, but I will use your recipe to form the basis of a Saint Martin Honey Pudding
I’ve just googled to check out what a Saint Martin honey pudding is…it looks and sounds incredible! I must have a go at one sometime. I’m delighted you’ve chosen to use the recipe I’ve shared to make your own creation. Enjoy. Liz
Iv just read out the recipe for this syrup pudding ,is it an error that it required 9 ounces of syrup, that sounds an awful lot .
Hi Nita, I’m so sorry, only just spotted your question. Yes, the amount the amount of syrup is correct. I agree it does sound a lot, but the abundance of syrup I feel is the making of this glorious pudding! One of my absolute favourites too x
Sounds yummy any chance of smaller serving recipes
I absolutely love this steamed syrup sponge! I will look at bringing some smaller serving recipes to the blog in the future… thanks for the suggestion!!😊
Hi Liz, I too am a lover of Nigella’s recipes, as I find they always work perfectly and I make her sticky toffee pudding recipe gf for myself which works great too.
My question to you is could I halve this recipe and also do you think it could work in the microwave to save time? Thanks for all your good work in sourcing gf recipes.
Hi, generally I’d say yes to halving the recipe, but as I used 3 large eggs it may be tricky to halve exactly – maybe easier to divide into thirds instead (if that makes sense!!). I haven’t tested the recipe in a microwave, however I have jotted down a microwave method for within the steamed jam sponge recipe I shared, which I have confidence will work OK for you!! That said, for ultimate steamed sponge experience, I’m going to say steaming your pud would be the way to go! Good luck, and whatever you decide on I hope the finished result is truly yummy!!!💫
Hi Liz, I tried this recipe and it was light, not too sweet, loved the lemon flavour and the way the golden syrup and lemon seeps through the sponge. I did serve it with a white custard making sure it wasn’t too sweet. Love the recipe… will be one of my favourites.
Hi Cheryl, I’m thrilled to hear how much you enjoyed the gluten free syrup sponge!! I was totally blown away with the recipe when I made it, and I do think the addition of lemon makes a world of difference, and cuts through the sweetness from the syrup wonderfully! Thanks so much for taking the time to leave a comment. I feel it will encourage many people to give this lovely recipe a whirl! 💫
I would title this as a lemon syrup pudding as the lemon is definitely the main flavour rather than the sweet golden syrup taste you would expect.
I agree the lemon flavour certainly does shine in this pudding – I really like how the lemon cuts through the sweetness of the syrup. The original steamed syrup sponge recipe I used is a Nigella Lawson special, which I simply adapted to be made gluten free, so I wouldn’t want to change the title of the recipe. However, your comment is really helpful for people to read, as it gives a true understanding of the flavours to expect when tucking into this yummy steamed sponge pudding! Thank you 💫