Updated 9th October 2025
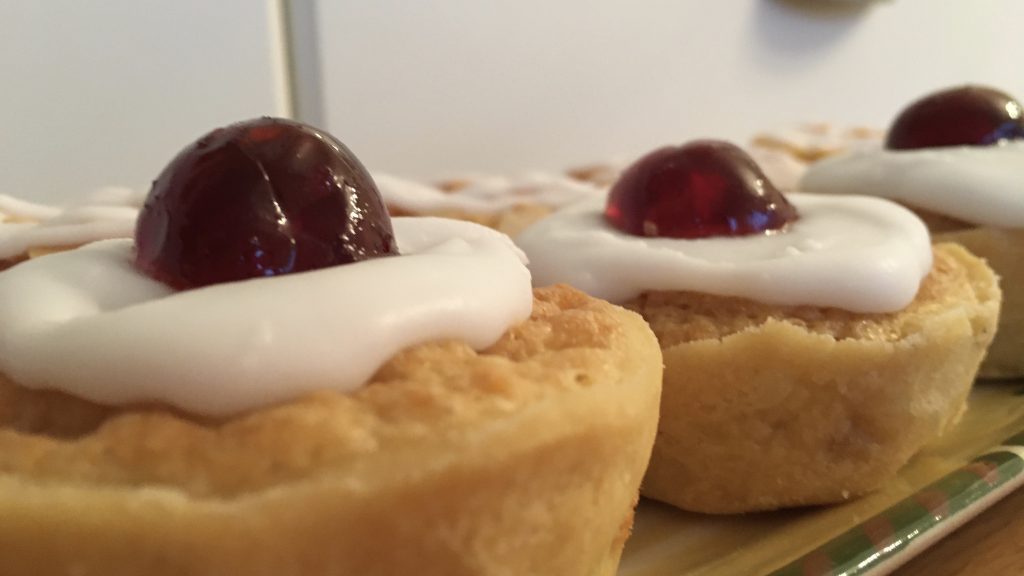
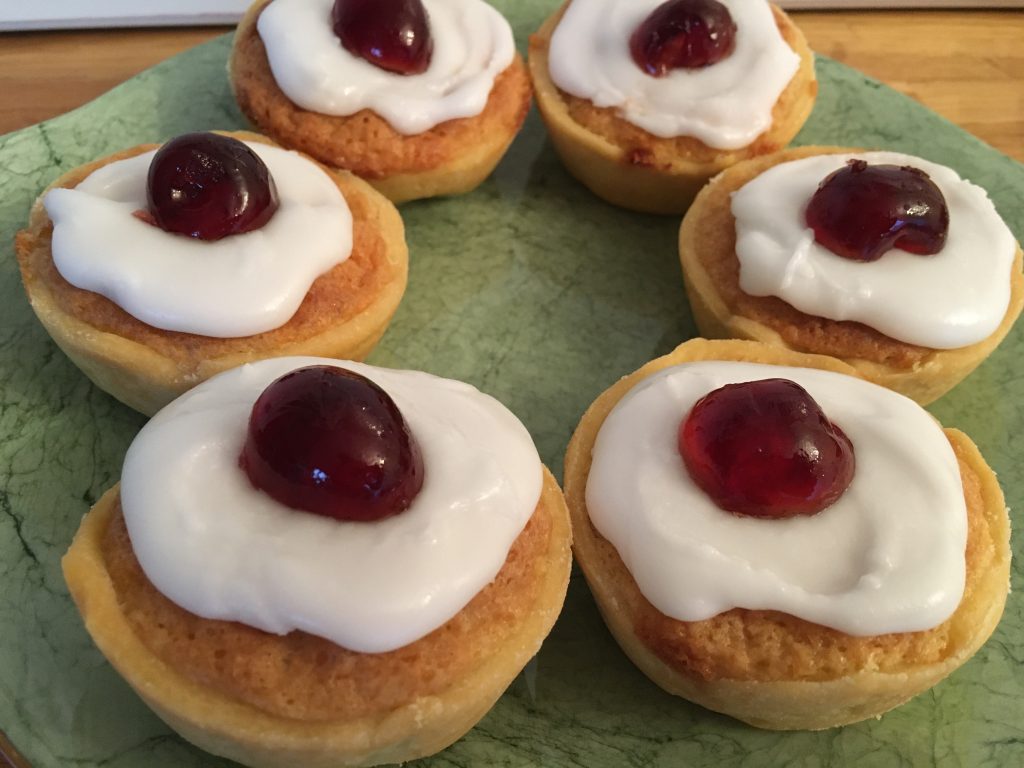
Delicious gluten free Cherry Bakewell’s, with a lovely light pastry base, filled with jam, soft frangipane, topped with glacé icing and crowned with a cherry. They may be a bit of a baking project, but are SO worth the effort.
I was inspired to make gluten free Cherry Bakewell’s after the success I had with the gluten free frangipane topped mince pies, that I now make every Christmas.
I’ve made these gluten free Cherry Bakewell’s a few times now. To mix things up on my second attempt, I scattered flaked almonds over a few of the tarts before popping them in the oven. Once baked and cooled, I piped glacé icing over the top. Neil absolutely loves them done this way!
Ingredients (makes 24)
For the gluten free pastry
200g (7oz) gluten free plain/all purpose flour
100g (3½oz) butter, cubed
1 large beaten egg
Add a pinch of salt to the flour if using unsalted butter
Cold water
For the filling
Cherry or raspberry jam (I’m a HUGE fan of Bonne Maman jams)
200g (7oz) softened butter
200g (7oz) caster sugar
200g (7oz) *ground almonds
4 large beaten eggs
1 teaspoon *almond essence
Optional *flaked almonds instead of adding a cherry
For the glace icing and to finish
200g (7oz) sifted icing sugar and enough boiled water to make it into a thick but spreadable paste
12 *glace cherries, halved
Method
Preheat the oven to 190C/375F/Gas 5/170C Fan.
Grease 2 x 12 hole muffin tins. To make life easier when removing the cherry Bakwell’s, secure a narrow strip of greaseproof to each into muffin hole. The strip of greaseproof will act as a handle when removing the baked tarts from the tin.
To make the gluten free pastry: Place he gluten free flour into a large mixing bowl and add the butter. Rub the butter into the flour until it resembles coarse breadcrumbs (any larger chunks of butter will be blended when you work the pastry before rolling it out).
Stir in the beaten egg, then add enough water to bring the pastry together (the amount you need each time may differ, dependant on room and ingredient temp). If you don’t add enough water, you will find the pastry difficult to work with. if you add a bit too much, don’t worry as you can ‘bring it back’ by adding a little extra gluten free flour.
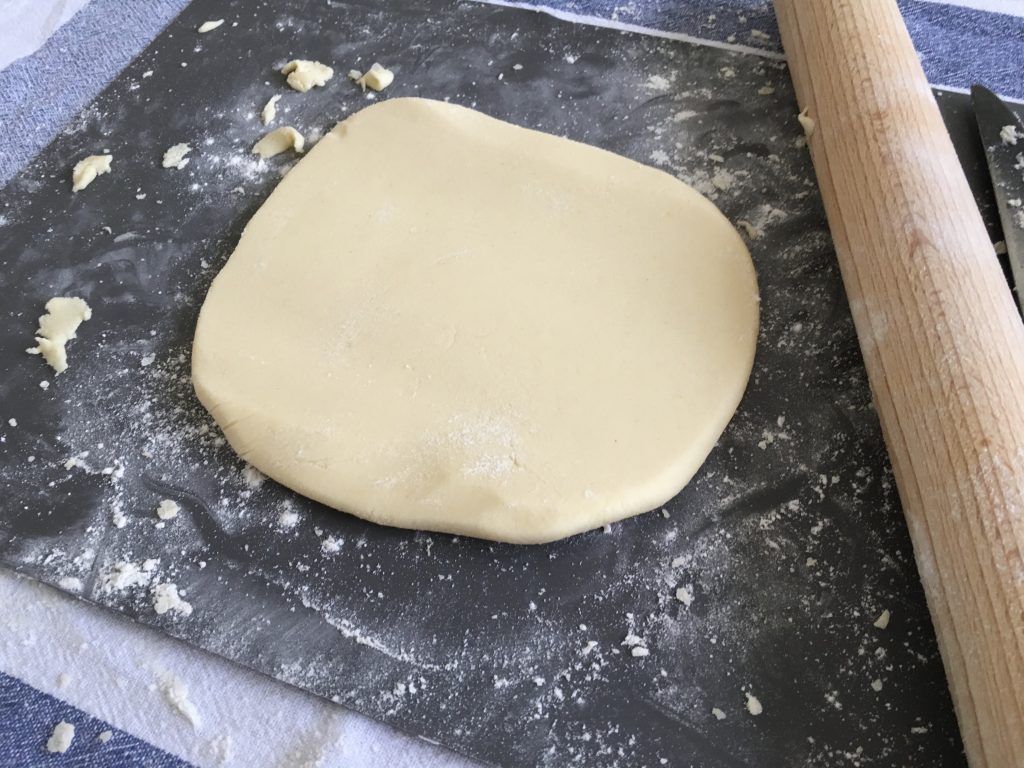
Form the pastry into a ball and transfer onto a clean surface, that you have dusted with gluten free flour and knead for a couple of minutes until the pastry becomes smooth. By doing this the pastry will be much easier to handle.
I would suggest that you cut the pastry in half before you start to roll it out as it will be much easier to handle in smaller quantities. Keep dusting your worksurface and rolling pin with gf flour to ensure the pastry doesn’t stick.
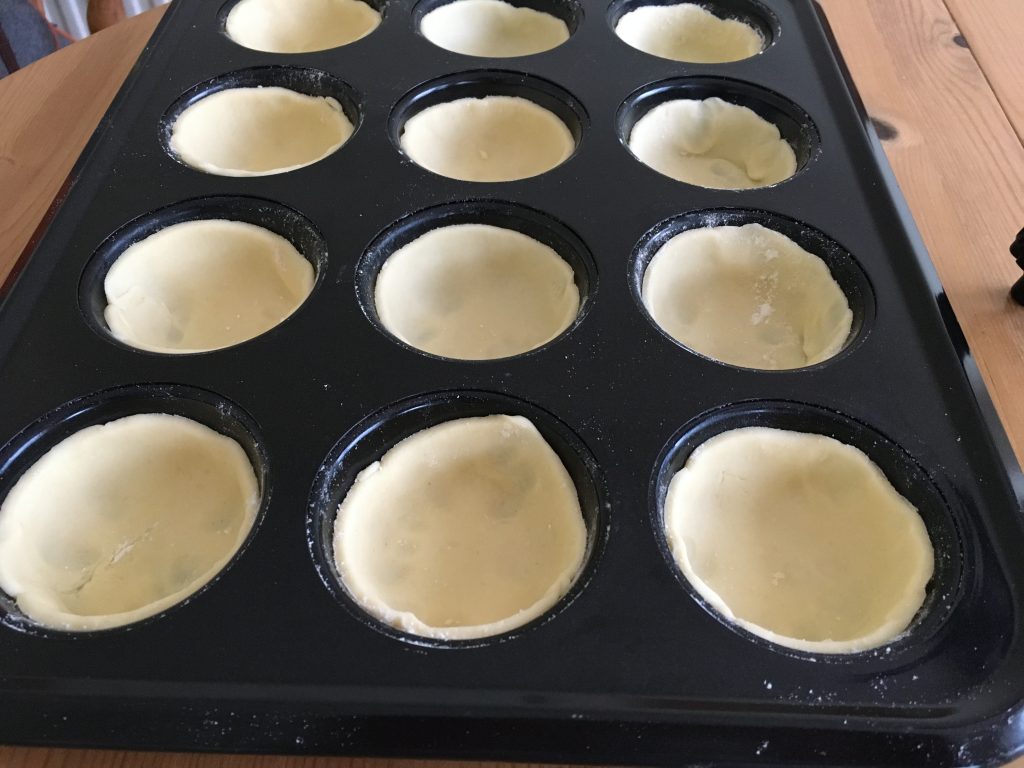
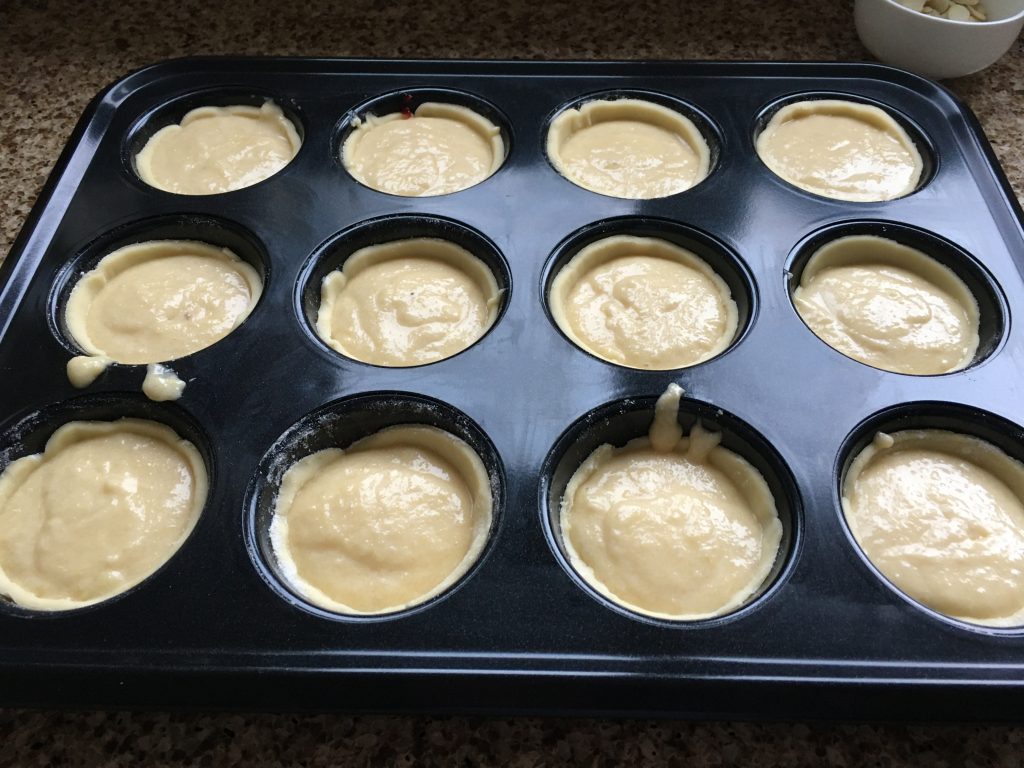
Once you have rolled out the pastry nice and thinly, take a large round cutter (approximately 3½ inch) and cut out the pastry circles. Using a palette knife, transfer the pastry circles into the muffin tins and gently ease them into each mould.
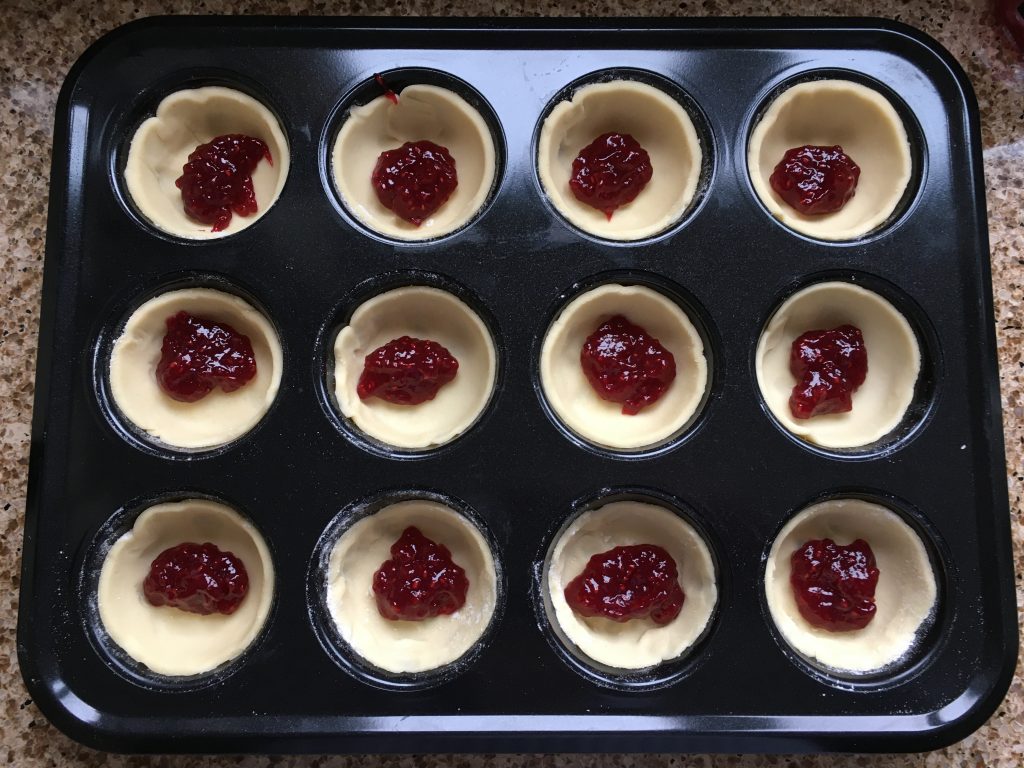
Fill each pastry case with a teaspoon of jam.
To make the Frangipane filling: Add the softened butter, sugar, ground almonds, eggs and almond extract to a large mixing bowl. Whisk together (ideally with an electric mixer but a large spoon would be fine) until the mixture is pale and creamy.
Grab a couple of dessertspoons and evenly distribute the frangipane mixture between the tarts.
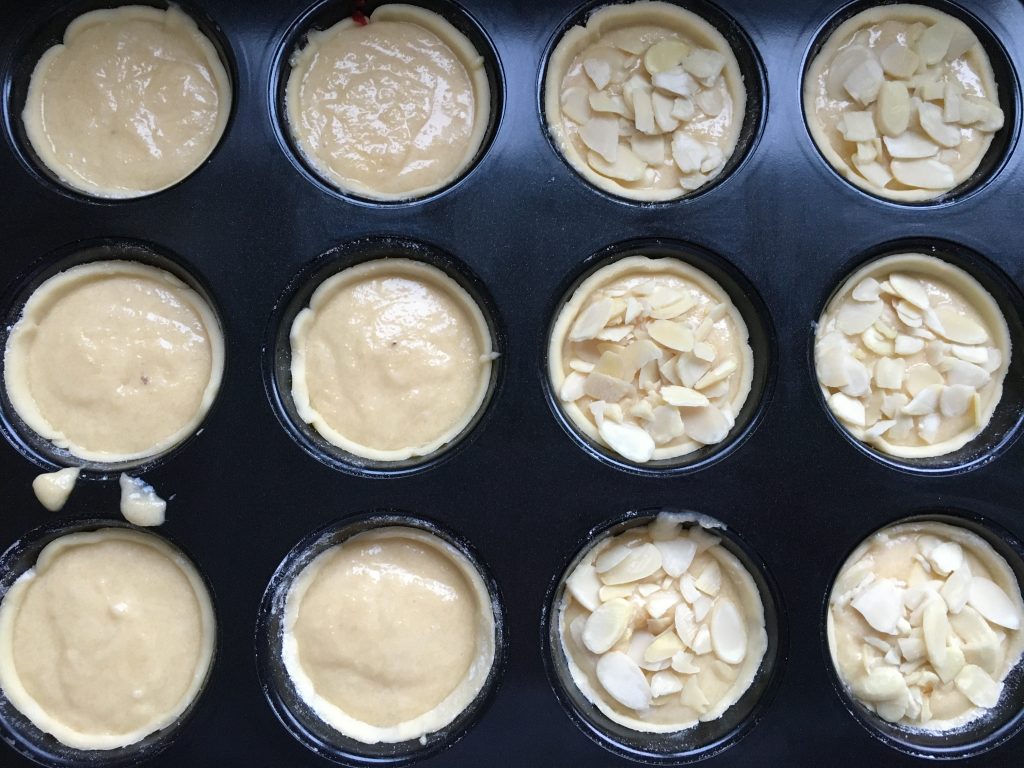
If you choose, you can sprinkle flaked almonds over some or all of the tarts before baking them.
Pop the tray’s into the oven and bake for approximately 20 minutes until the tarts are golden brown and firm to touch.
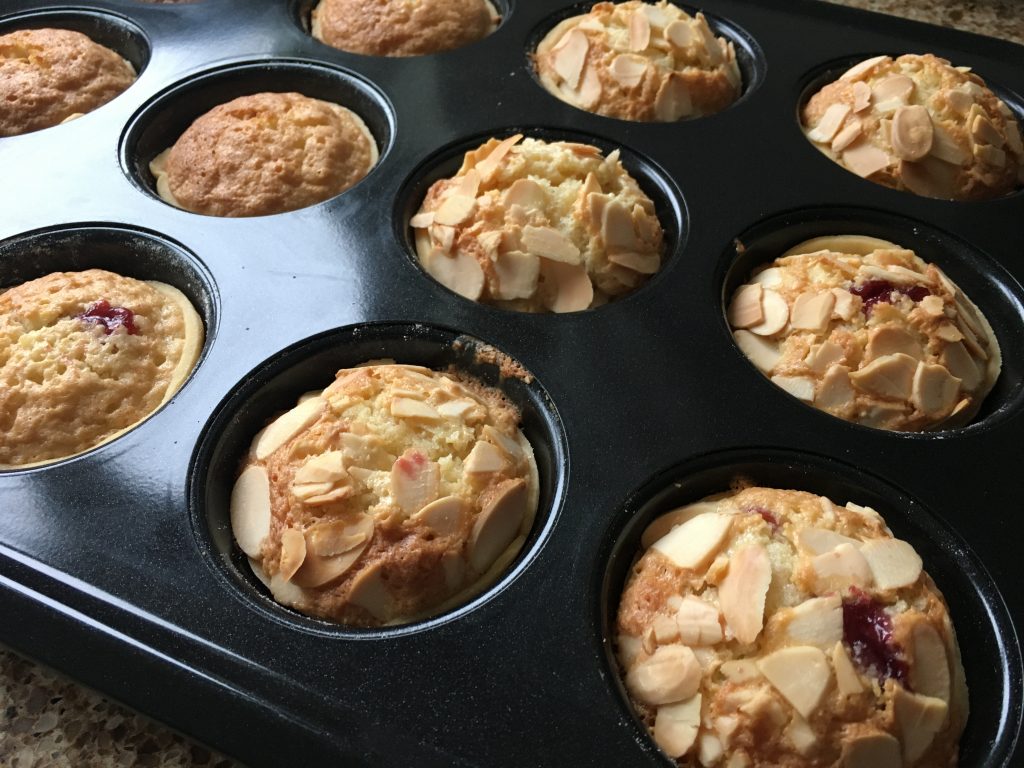
Once baked remove from the oven and allow to cool before removing from the tin onto a cooling rack.
To make the glace icing: Gradually add enough boiled water to the icing sugar to make a thick smooth spreadable paste.
Using a couple of teaspoons, spoon the icing onto each tart and then gently smooth out with a blunt kitchen/palette knife.
Pop half a cherry onto the centre each tart.
Recipe notes and suggestions:
Gluten free Cherry Bakewell’s will keep well in an airtight container for up to five days.
The tarts can be frozen if they’ve not been iced.
Should you wish to only make 12 tarts and use the other half of pastry for something else, simply halve the frangipane ingredients.
Thanks for checking out my gluten free Cherry Bakewell’s recipe.
I’ve also shared a demo of this recipe on my YouTube channel, which you can watch here.
For now,
Liz x
*Check this product to ensure that there are no gluten containing ingredients, ‘may contain’ or ‘not suitable’ for a coeliac/gluten free diet warnings on the pack.